|
Becoming a familiar with drawing proportions well are a fundamental pillar of figure drawing. Whether you are drawing regular characters, cartoons and even super heroes it all builds from a solid understanding of basic human proportions. In this tutorial I highlight the aspects of generating proper proportions in your characters.
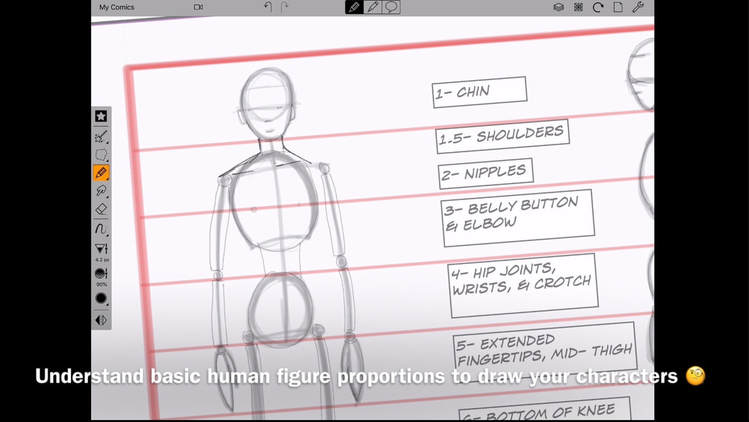
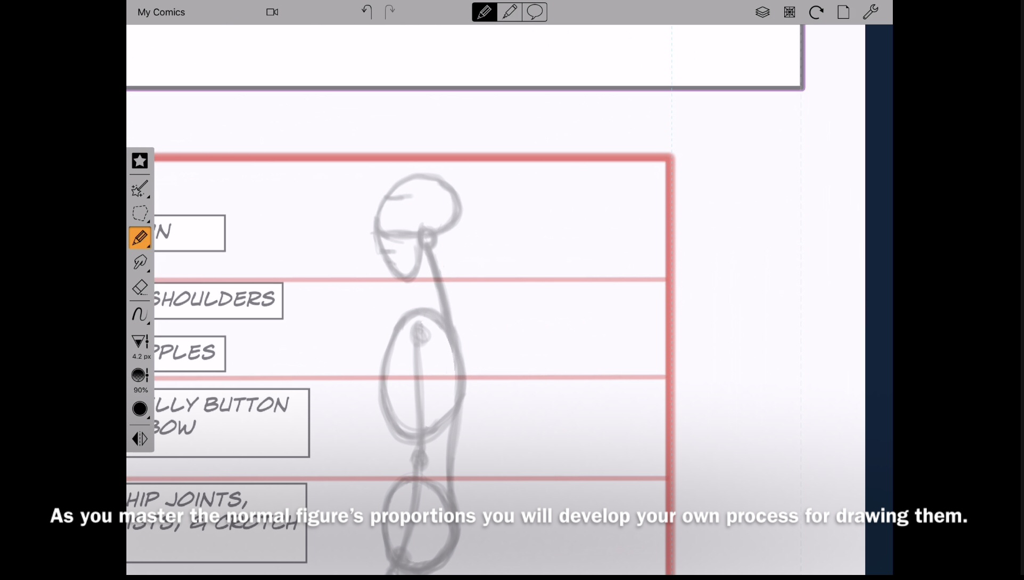
To draw characters we must start with a basic understanding of the human figure and its proportions.
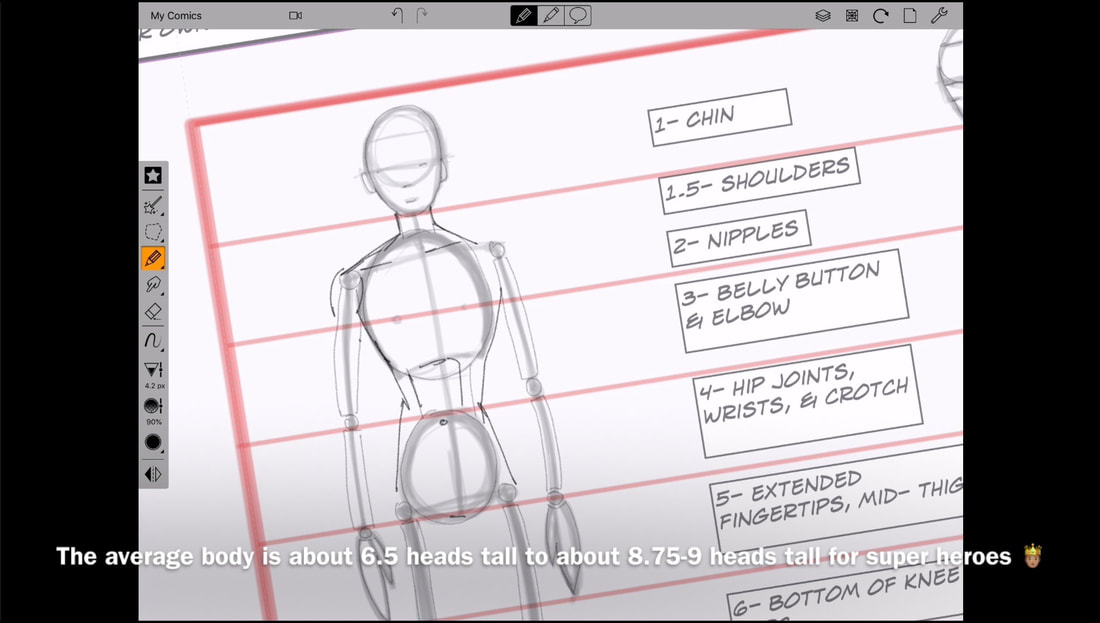
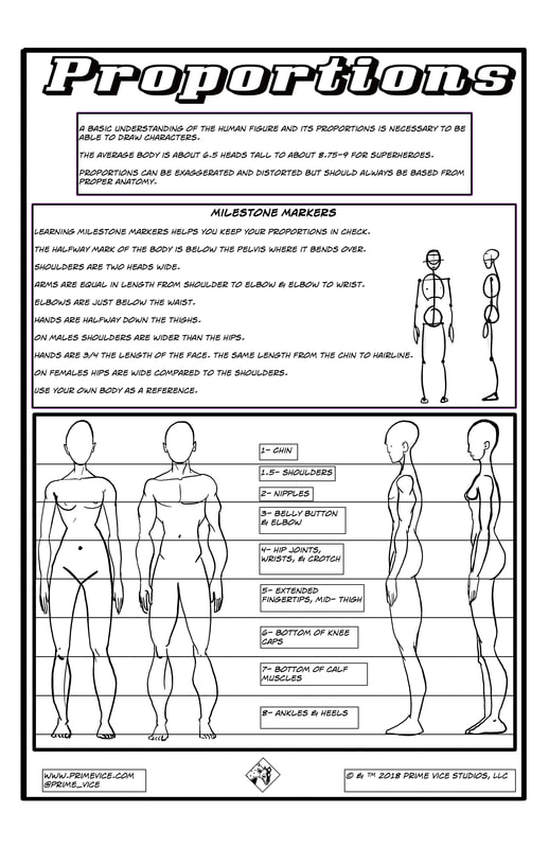
The head is the common unit of measurement for bodies. The average body is usually about 6 & half heads tall for male and female. Superheroes are usually drawing 8 and three quarters to 9 heads tall.
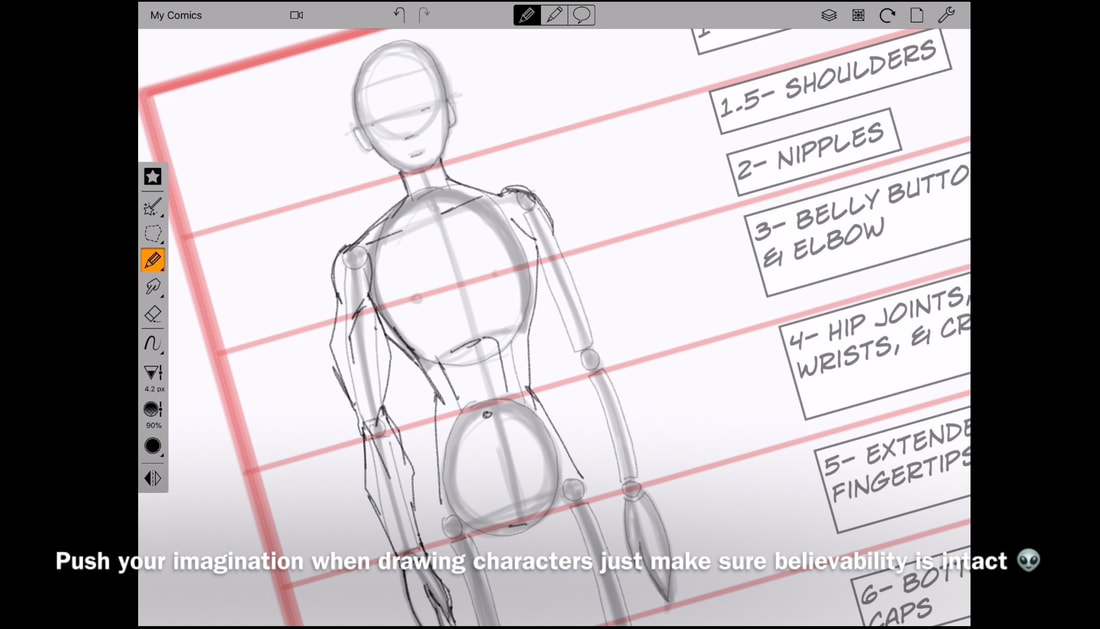
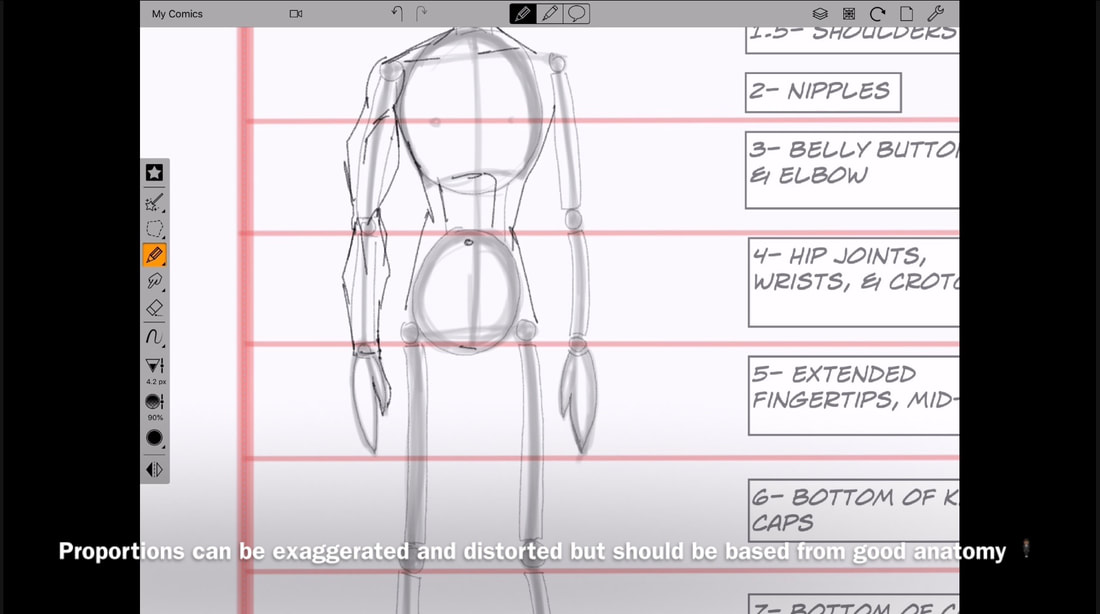
Feel free to push your imagination and experiment. Exaggerating and distorting is encouraged as long as the figure is believable. This comes from basing your manipulation on good anatomy.
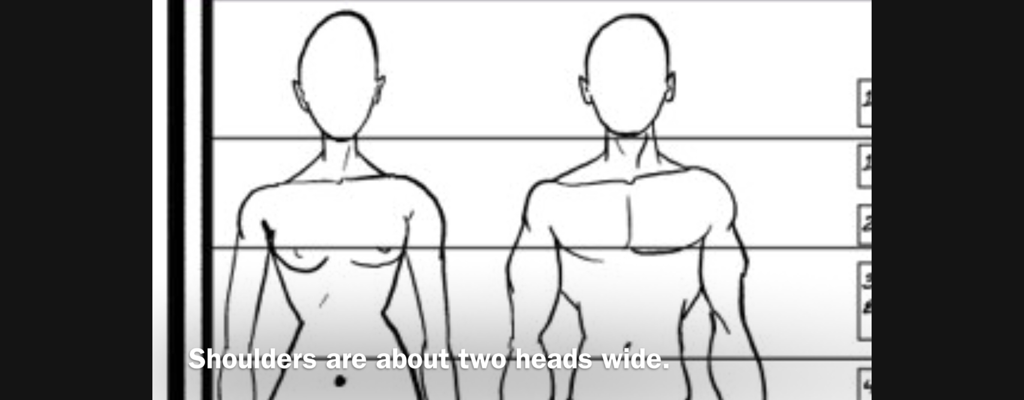
Typical shoulders are about two heads lying sideways wide.
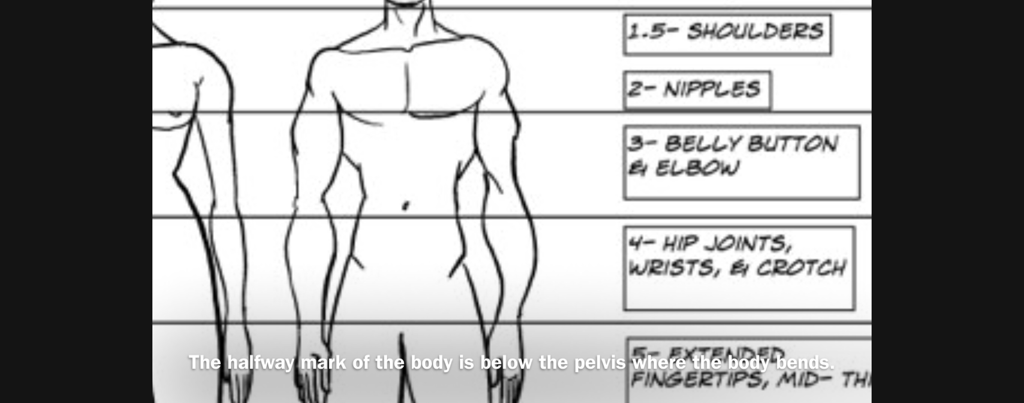
The body bends below the pelvis. This is also the halfway point. Useful knowing to make sure the body is balanced when standing up.
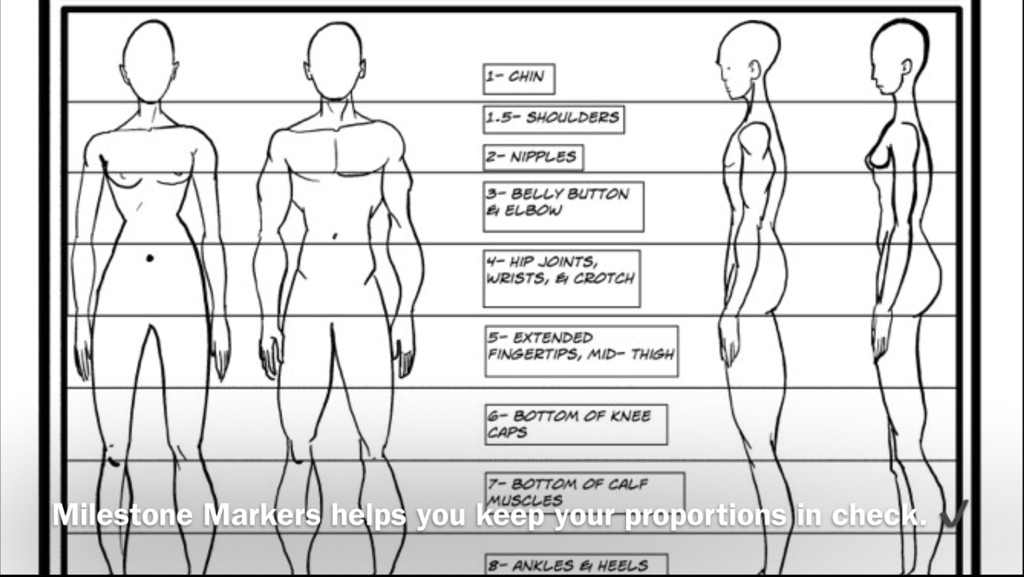
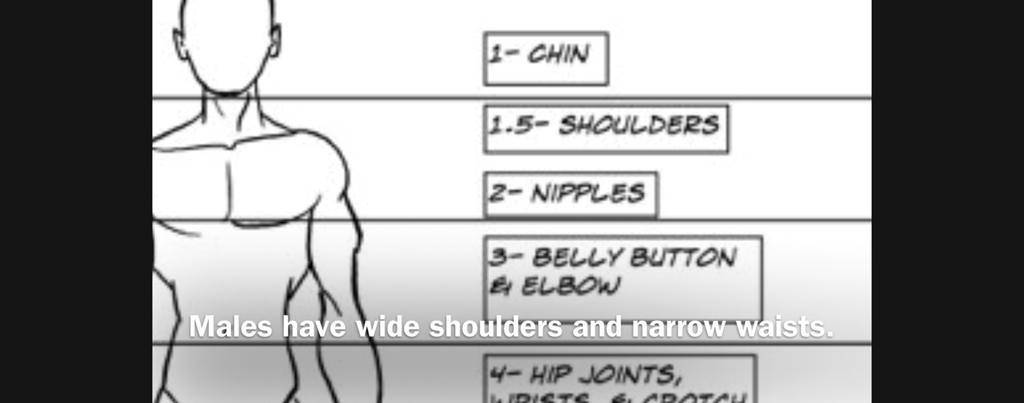
Milestone markers are reference points and rules of thumb to remember on the body you can use to measure parts in comparison to each other. You can guess the ones listed below or come up with your own that flow with your drawing style.
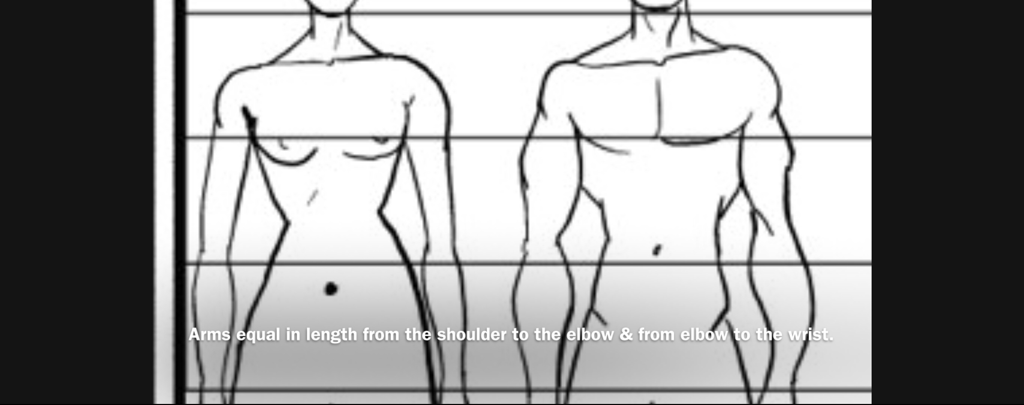
If you divide the arm at the elbow would be equal from the shoulder & from the wrist.
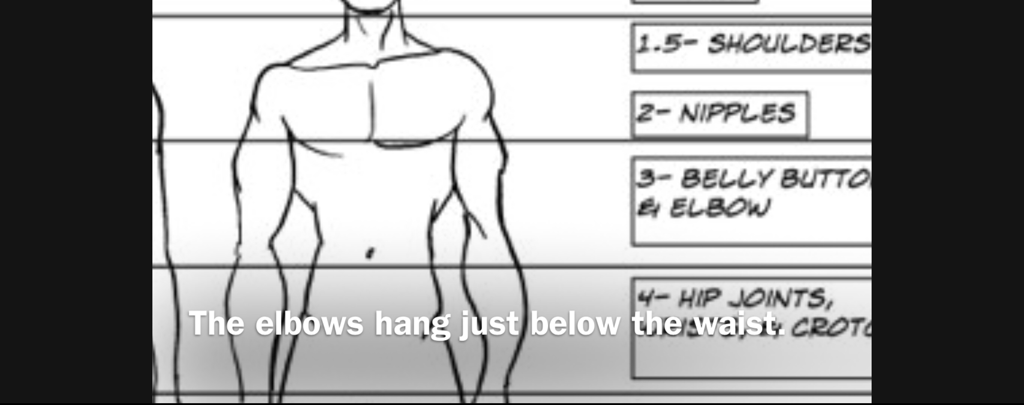
The elbows themselves hang just below the waist.
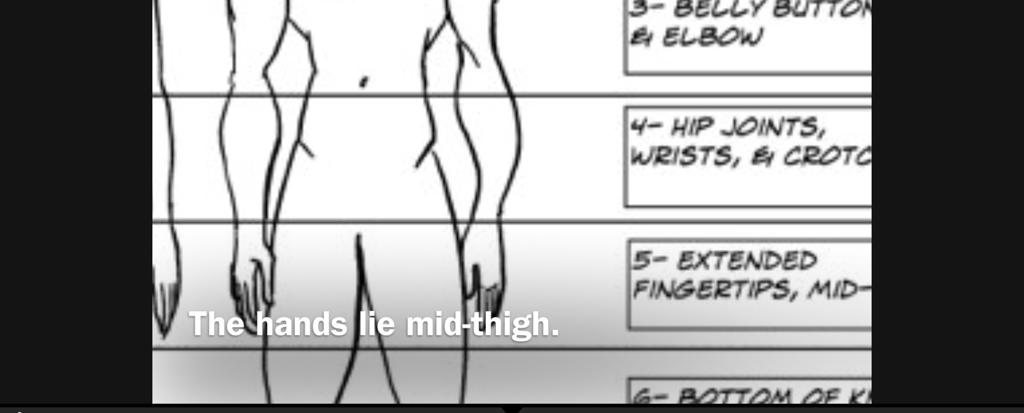
The hands hang from the wrist at the mid-thigh.
When drawing men, a differentiating feature are the shoulders being wide while the waists & hips are narrow.
Comparatively with women the hips are wide & round relative to the shoulders.
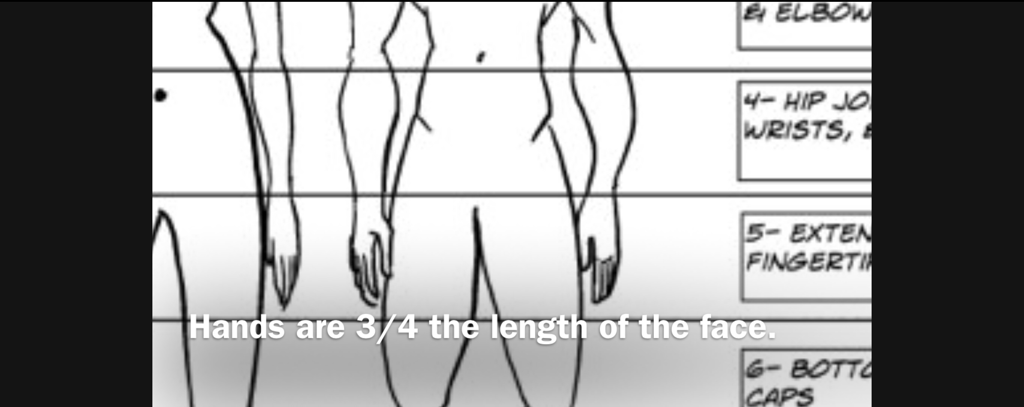
Hands are 3/4 the length of the face. Roughly the same length of the chin to the hairline.
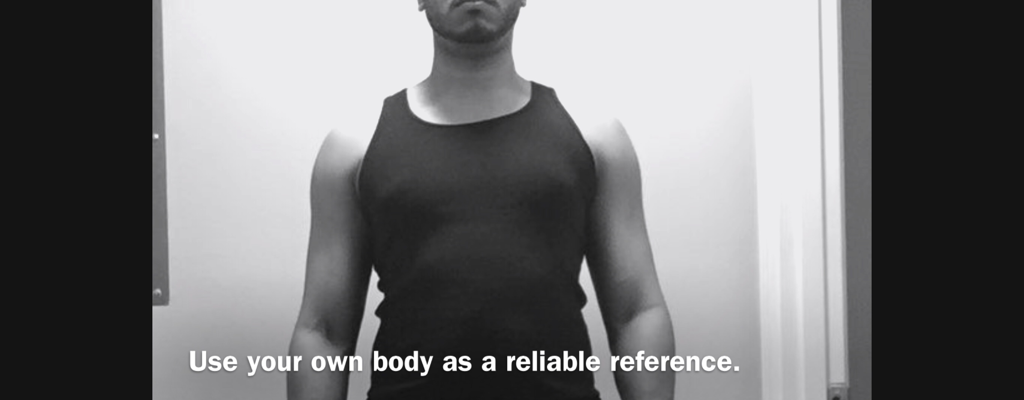
Use your own body as a reliable real life reference.
It takes time to master the locations of milestone markers. As you gain a grasp on this concept you will develop your own system to draw proportionate figures with facility.
This fundamental understanding of the human figure will allow you develop the skills to draw them simply and further be able to build upon your characters with accuracy. Most of all, they will demonstrate believability to your audience. Thank you for checking out this week’s tutorial. I hope you’ve found it useful. Please add any comments below. I’d love to help my fellow artists on their comic journeys. Additionally Prime Vice Studios is available to help people on their comic creation journeys. Hire us for professional assistance at any level of your creative process. Check out the additional resources below for links to the references & materials used. Peace, Loso Special thanks to our official sponsor Plasq for providing the invaluable app Comic Draw! follow on us social media! @Prime_Vice #primevice @AnanyaVahal @Plasq @ComicDrawApp #comicdraw #startyourcomictoday @ComicConnect Additional Resources
Additional shout out to Joumana Medlej for additional reference material.Checkout the link below for more of her stuff:
https://design.tutsplus.com/articles/human-anatomy-fundamentals-basic-body-proportions--vector-18254
0 Comments
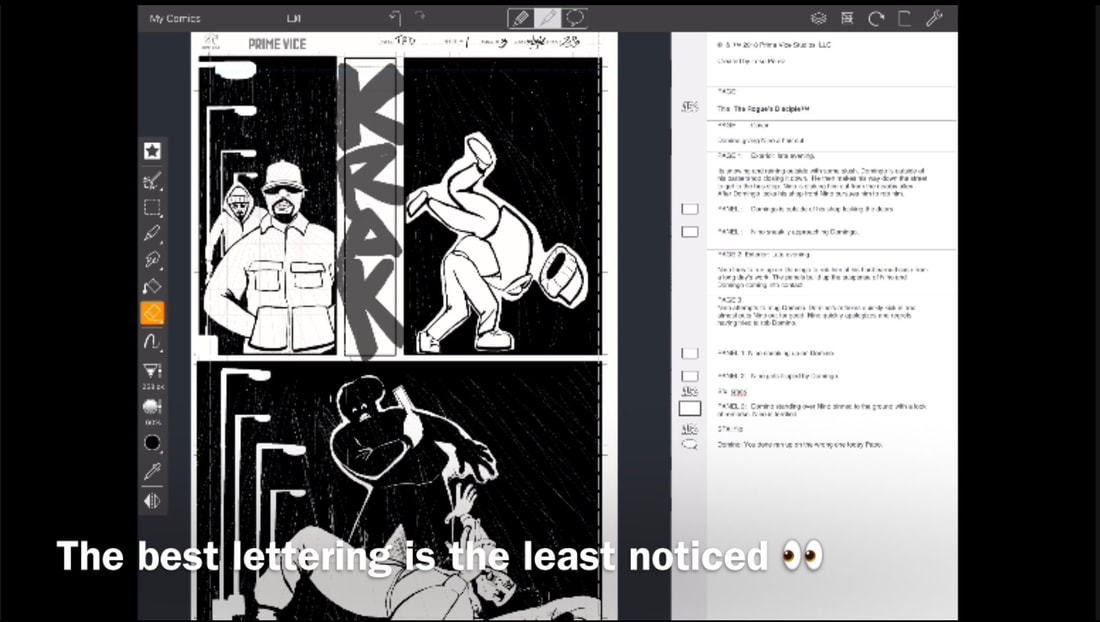
Lettering is an imperative skill to master. When done well its just about invisible. When done wrong it will ruin the reader’s experience.
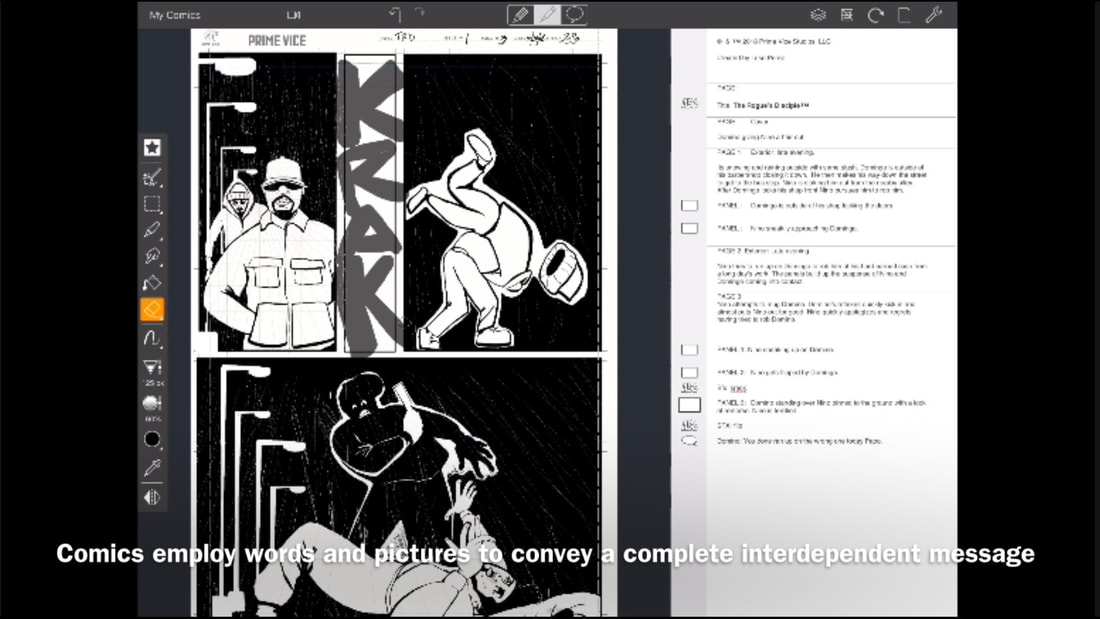
Comics combine the attributes of visual art and literature in a synergetic manner to convey a message. The words and and visual arts both play a role in creating a comprehensive reading experience that rely on both components to be complete.
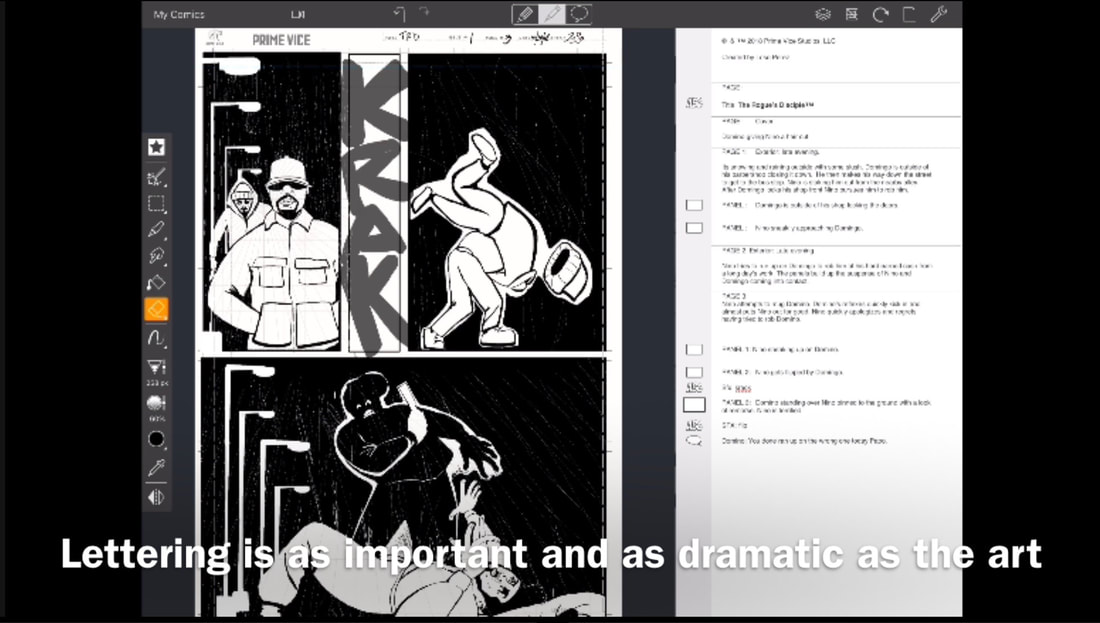
When lettering your comics understand that it is as important and dramatic as the art itself.
Good lettering work does not stand out. The least noticeable, the better.
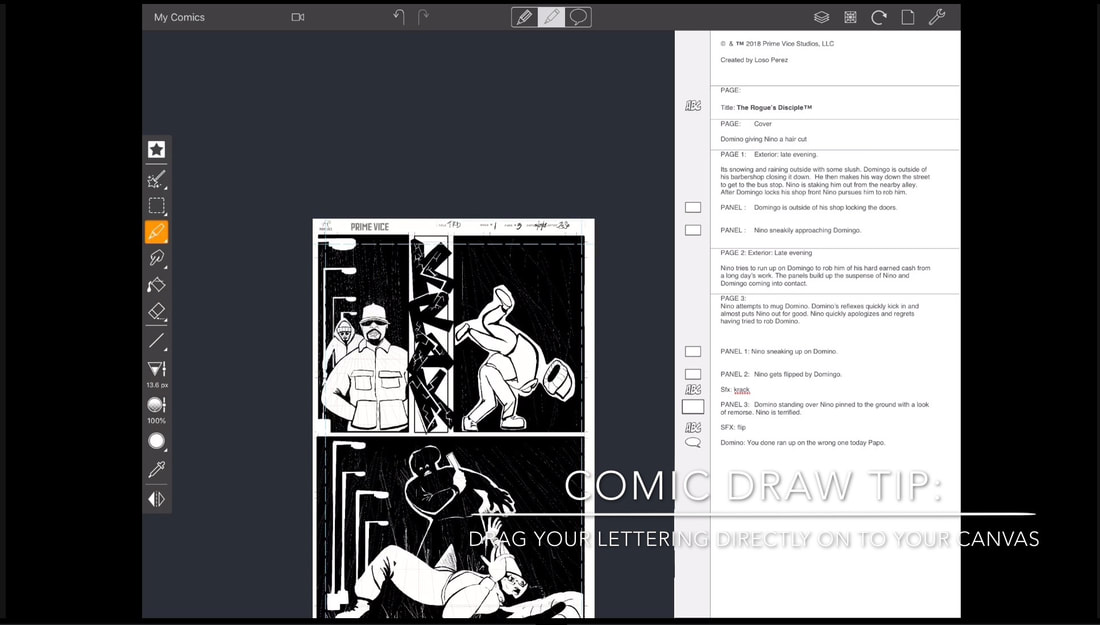
The Comic Draw app was specially designed with useful lettering capabilities. One of the best feature is that if your comic is in the typical format you can drag your dialog, captions & special effects directly onto your pages and adjust them accordingly. You can also quickly block in balloons, captions, titles & special effects so that you can get a feel for how much space it may take up in a panel.
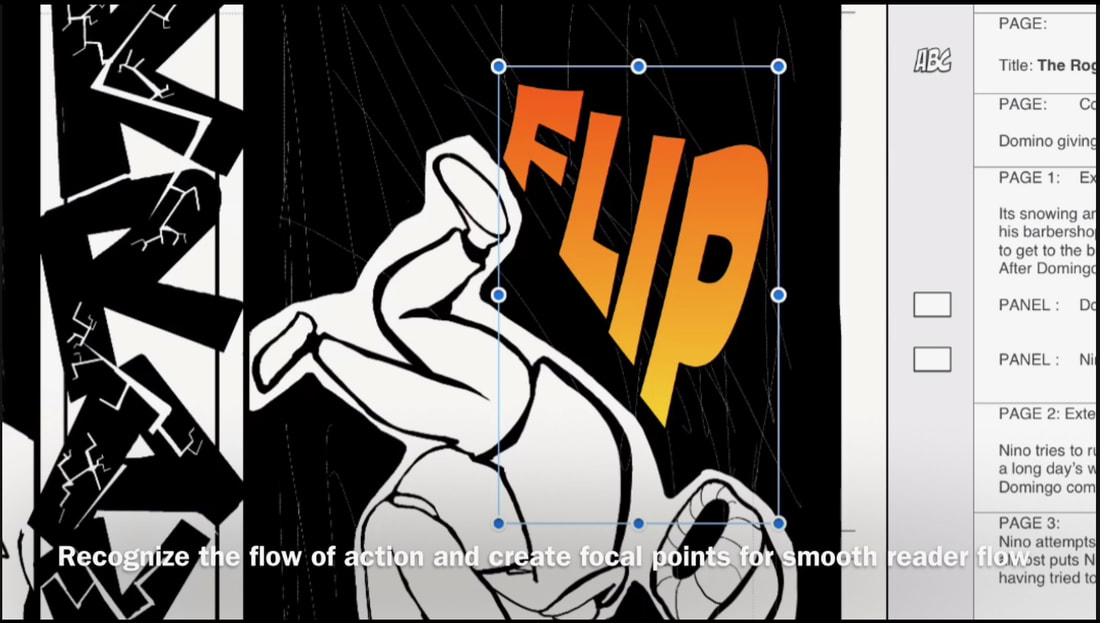
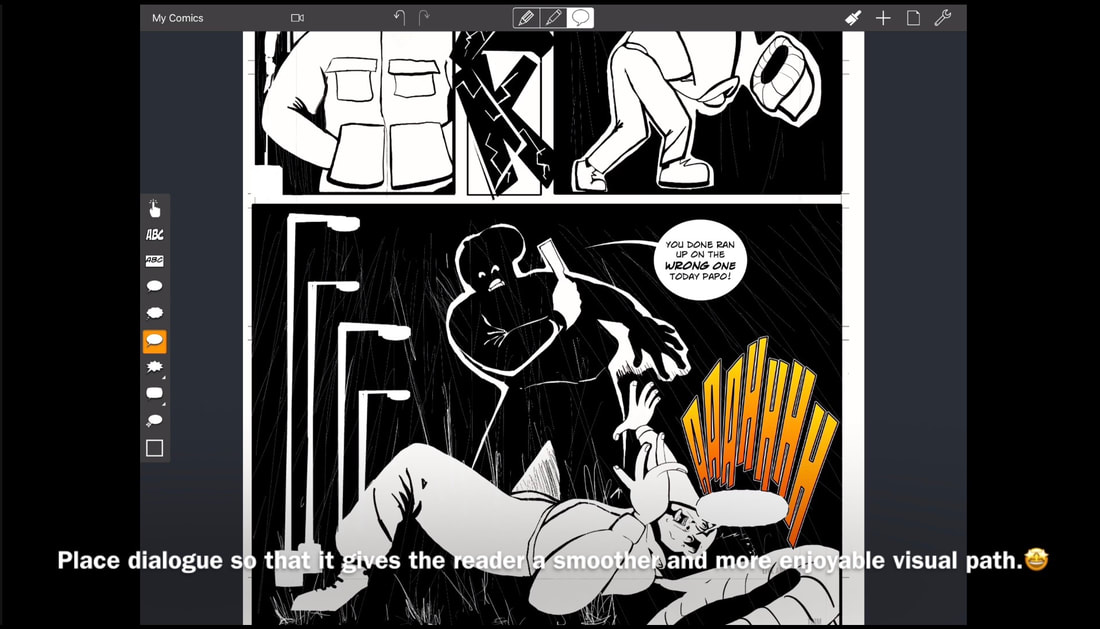
When adding lettering elements pay attention to the flow of action. Create focal points for smooth reader flow. Lettering needs to guide the reader’s eyes through the page.
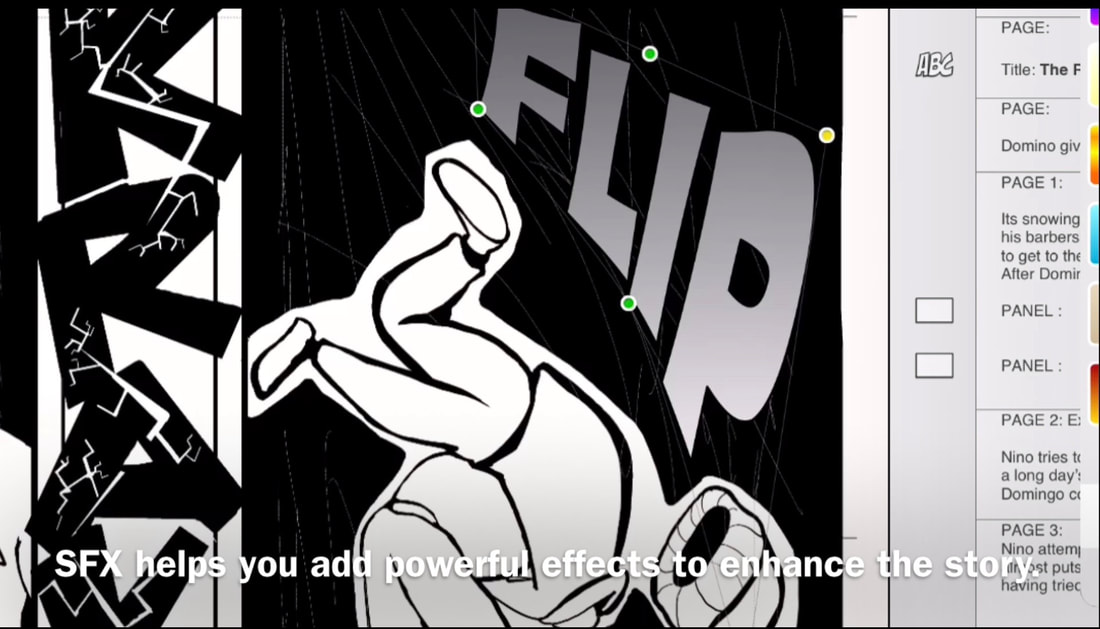
Sound Effects & onomatopoeias are fun ways to enhance the story’s impact.
When placing dialogue and captions make it so the reader is given a smooth visual path. Pay attention to the rhythm and direction of the page flow.
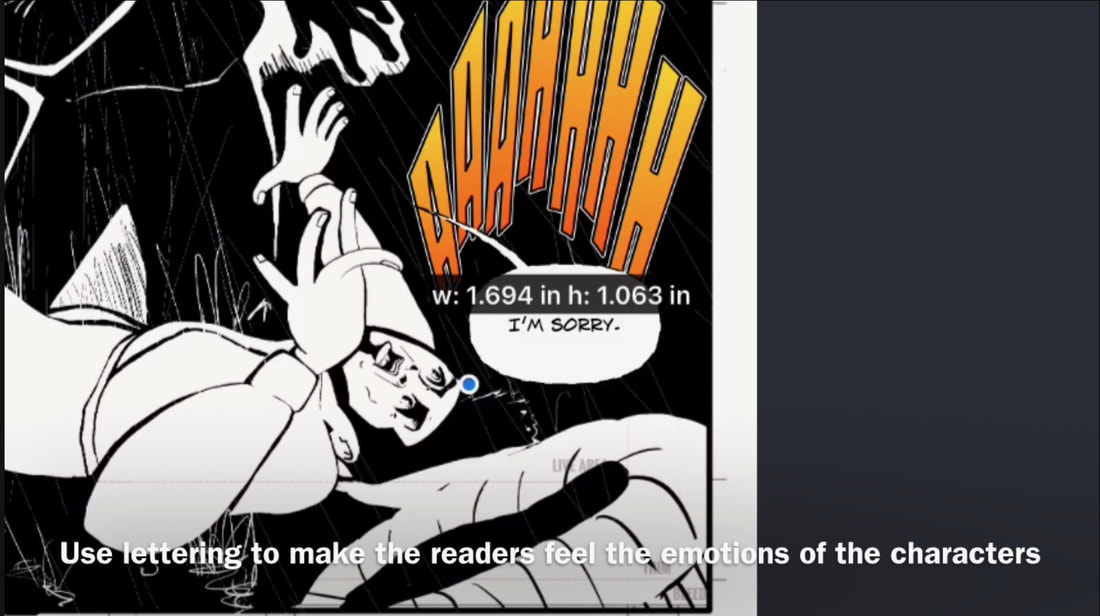
A particular attribute to comics lettering is that you can use them to make the reader feel the emotions of the characters. Manipulate components of your letters to convey emotional impact such changing the size and style of the type and choosing speech bubbles of different shapes.
A good comic panel shouldn’t have to rely on dialog to be generally understood. Cartooning is a universal language that can be understood globally. Lettering is a unique specialty of the comics medium that supplements comprehension. When done well it communicates nuances that are imperative to understand and enjoy the story.
Thank you for tuning into this week’s tutorial. I hope it has been helpful. Additionally Prime Vice Studios is available to help people on their comic creation journeys. Hire us for professional assistance at any level of your creative process. Check out the additional resources below for links to the references & materials used. Peace, Loso Special thanks to our official sponsor Plasq for providing the invaluable app Comic Draw! follow on us social media! @Prime_Vice #primevice @AnanyaVahal @Plasq @ComicDrawApp #comicdraw #startyourcomictoday @ComicConnect Additional Resources
Consistency is crucial. When drawing comics there is always a tendency to change little nuances of your character.
This week’s tutorial explains the usefulness and purpose of character sheets.
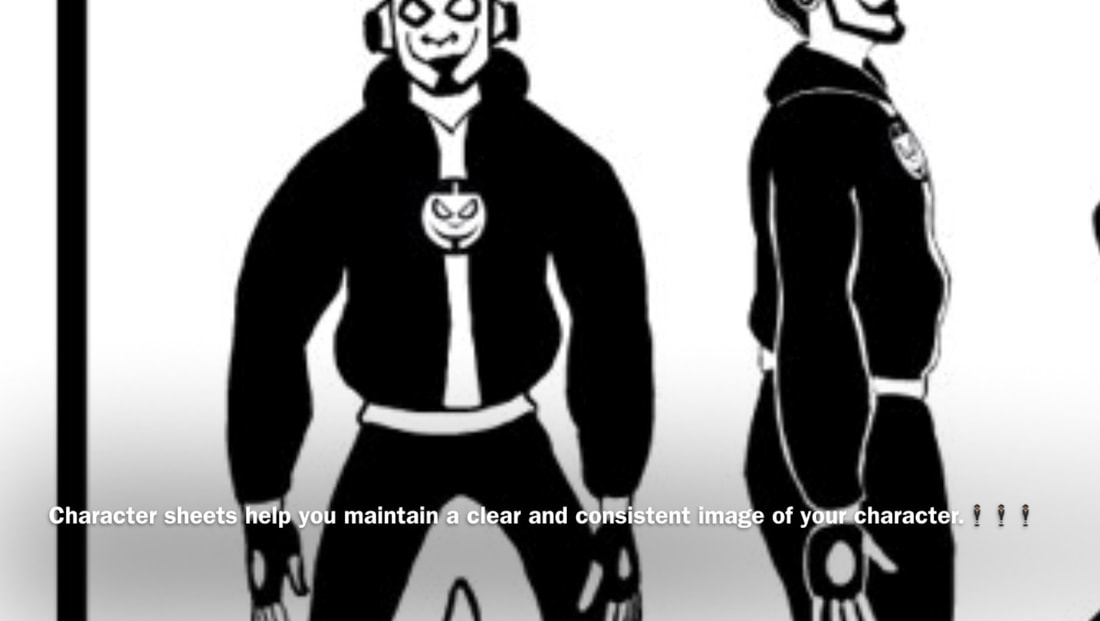
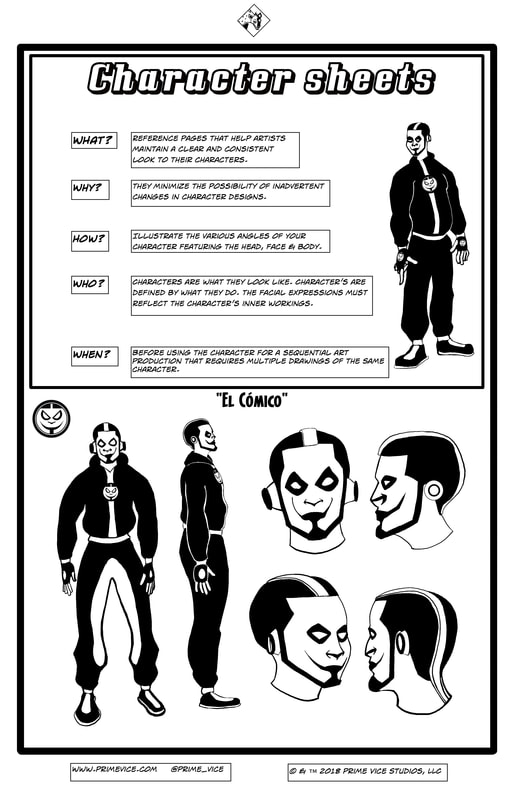
Character sheets help you maintain a clear and consistent image of your character. They serve as reference pages to help you maintain a clear and consistent look for your characters.
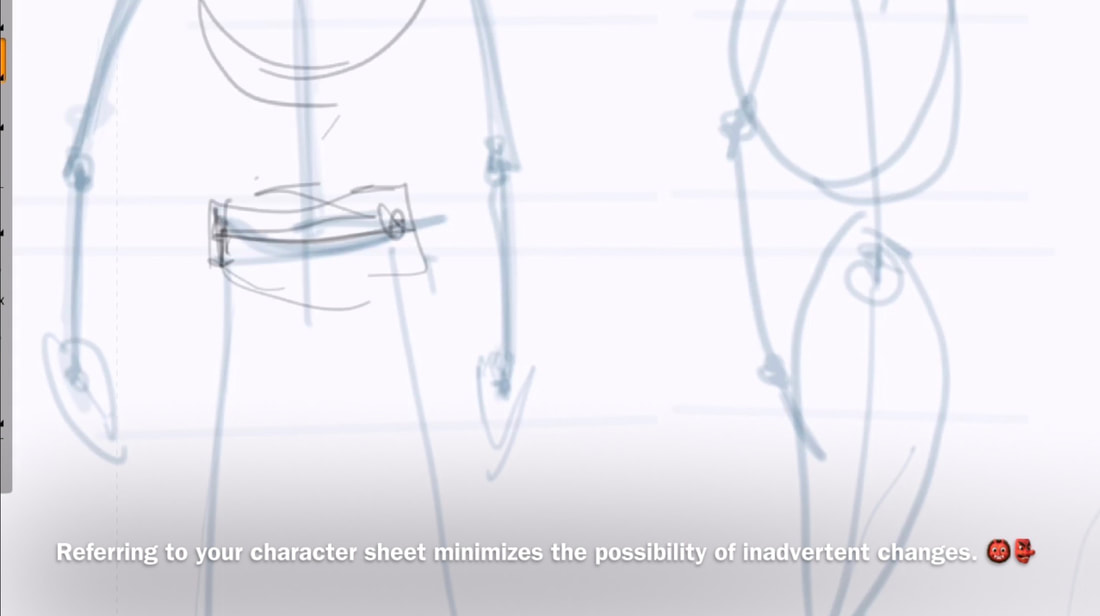
Referring to your character sheet minimizes the possibility of inadvertent changes.
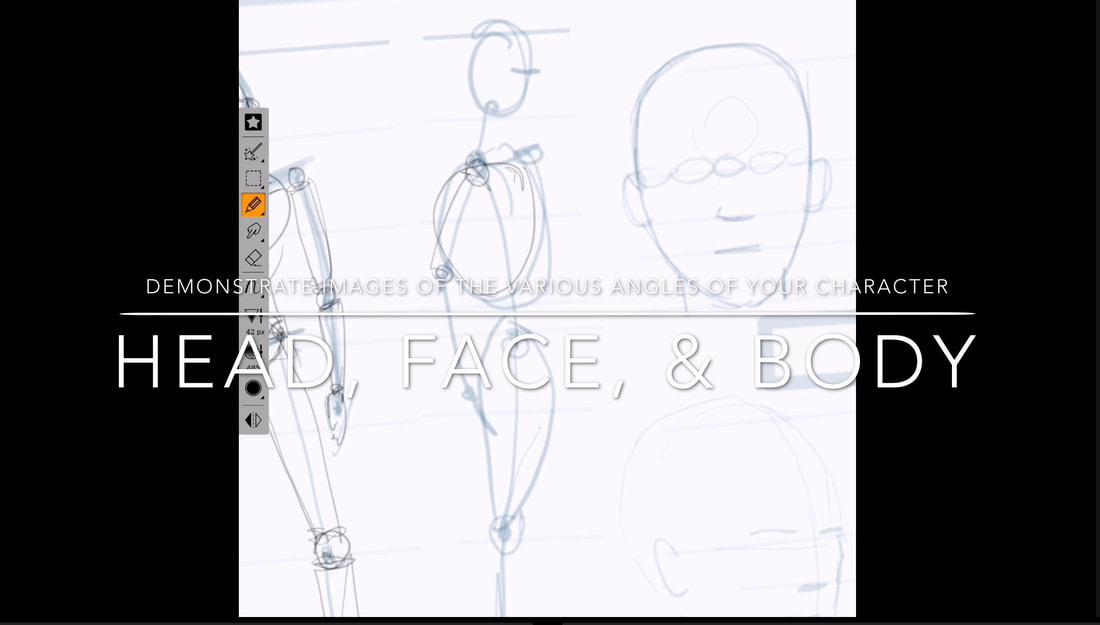
Serving as references, character sheets help you keep small changes to a minimum. You can alway look back to see if you’ve been drawing a nose different on your current page than when you started your comic. A common occurrence. Demonstrate images of the various angles of your character. When designing your character sheets make sure you draw the head, the face with an expression or two and the full body front, back. Three quarter views are usually most interesting. Straight on front & back is standard. 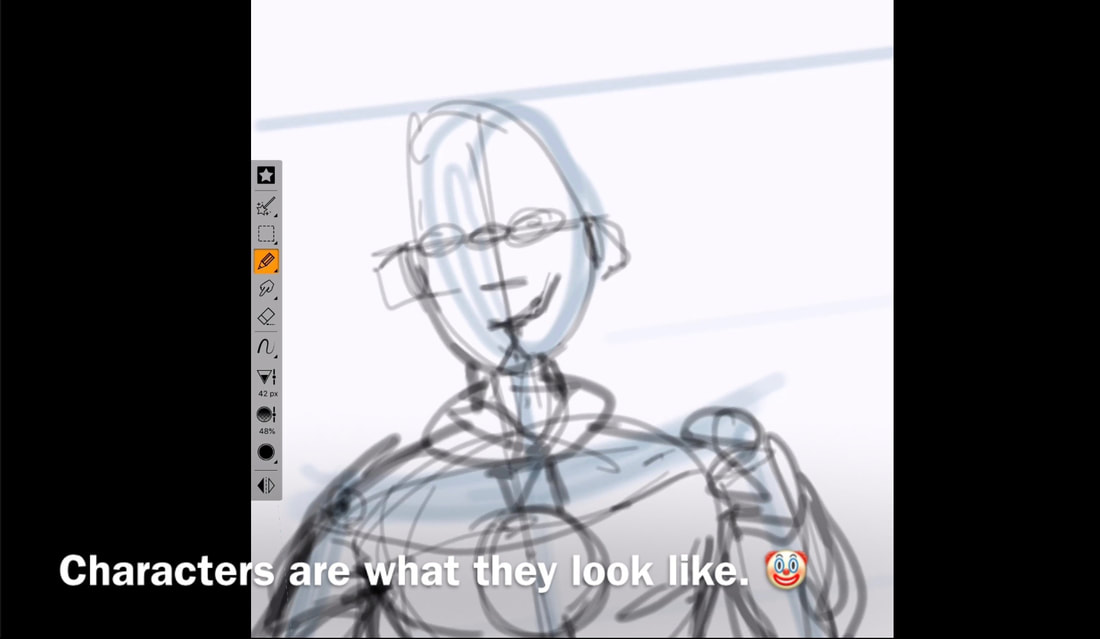
Characters are what they look like. When designing your characters clearly show the character’s attitudes. Ask yourself what are they thinking? What do they do? what is their story? Why do they look the way do? Character’s are defined by what they do
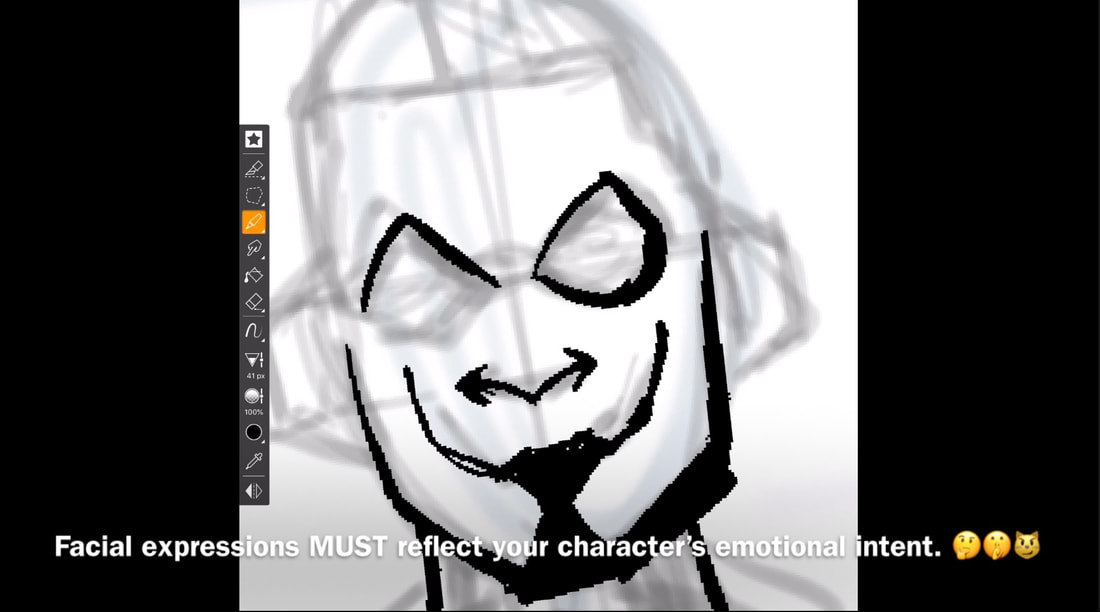
Facial expressions MUST reflect your character’s emotional intent. Their facade must clearly tell you & the reader the character’s inner workings.
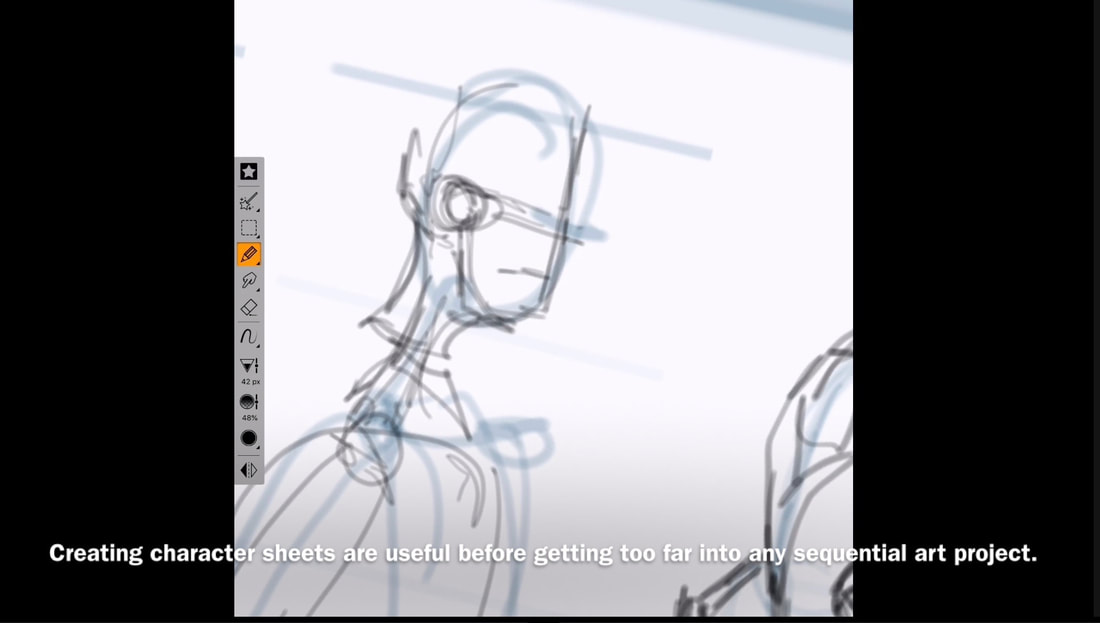
Creating character sheets are useful before getting too far into any sequential art project. You may start your comic before fully designing your character or realizing something may need to be changed. You just don’t want to have to go back and redraw a character because you changed something after getting far into a project.
Thank you for tuning into this week’s tutorial. I hope this has been helpful. Prime Vice Studios is available to help your comic creation journey. Hire us for professional assistance.
Check out the additional resources below for links to the references & materials I use. Peace, Loso Special thanks to our official sponsor Plasq for providing the invaluable app Comic Draw! follow on us social media! @Prime_Vice #primevice @AnanyaVahal @Plasq @ComicDrawApp #comicdraw #startyourcomictoday @ComicConnect Additional Resources
When drawing cartoons the eyes must be handled with special consideration.The eyes contain and express the spirit of the character.
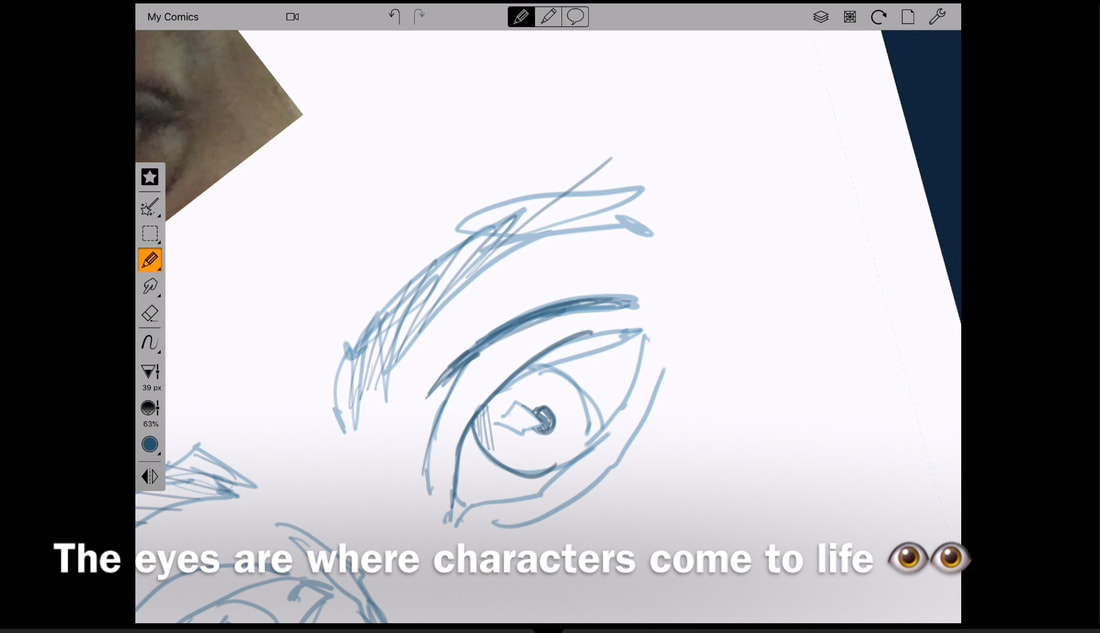
The eyes are where the characters live they communicate thoughts, feelings and expressions better than any other part of the body.
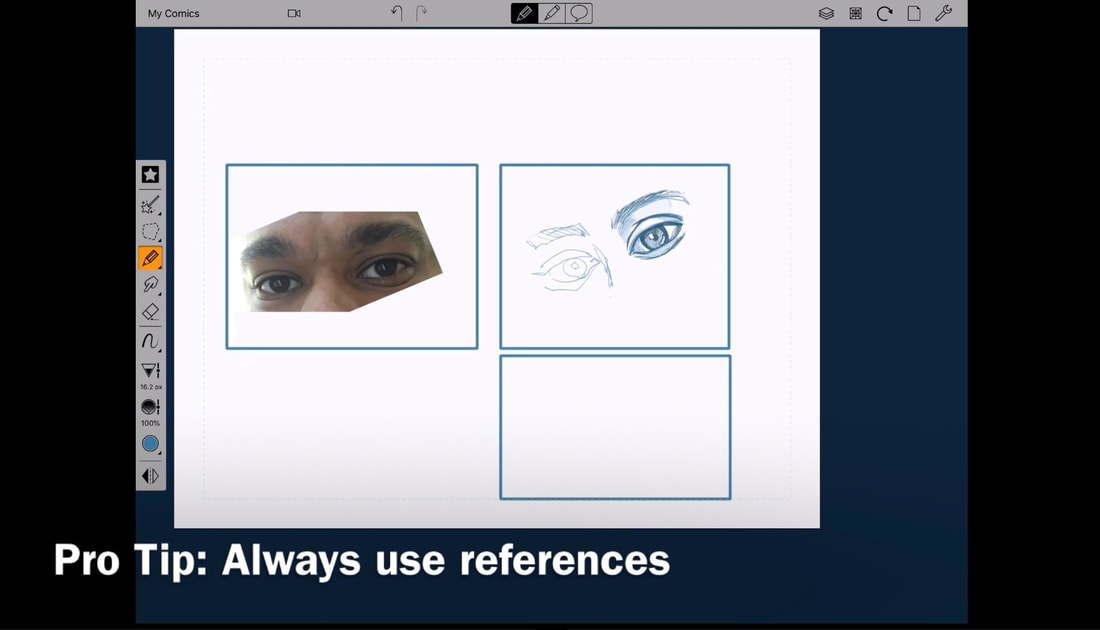
Whether you are drawing realistic or cartoony eyes remember to use references for believability purposes.
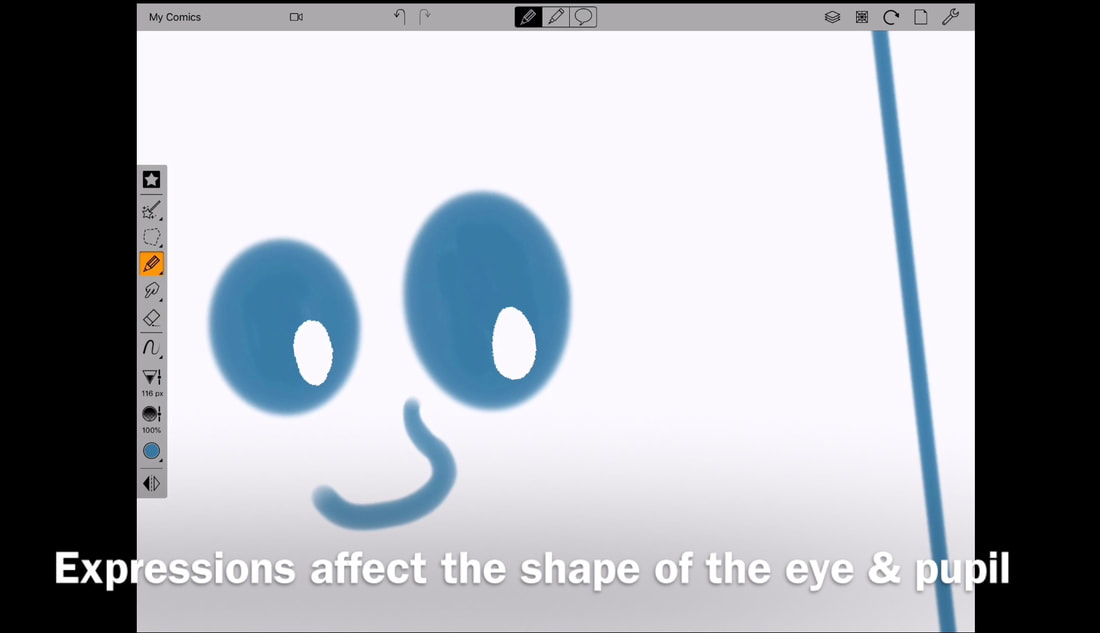
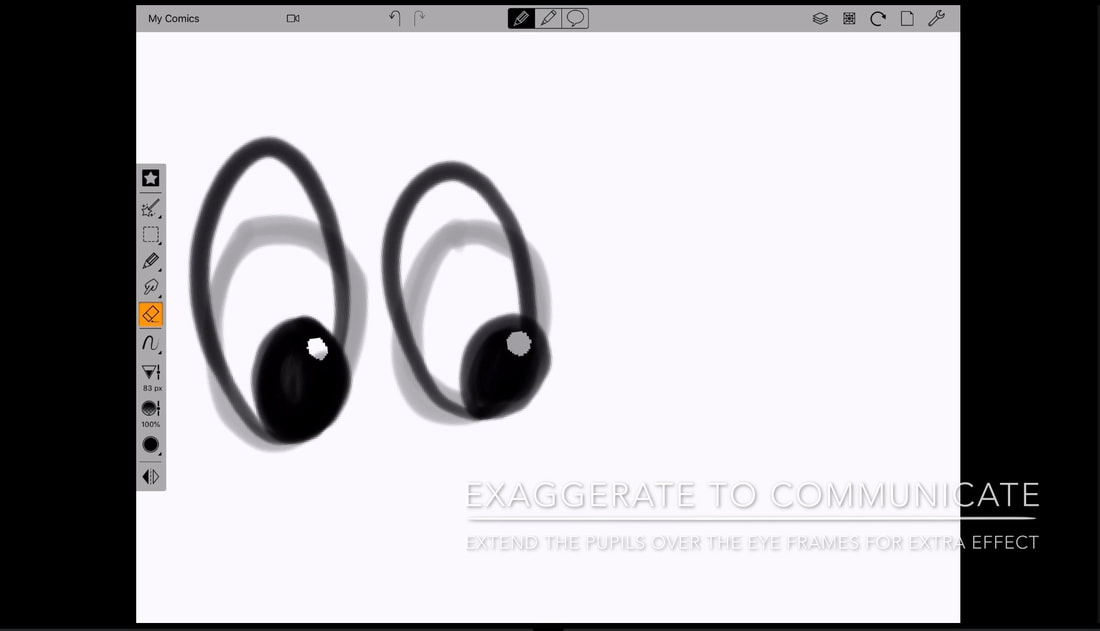
When drawing pupils you can be simplistic using small neat balls with a shine and get a clear expression.
Understand that the shape of the eye & pupil change depending on the expression.
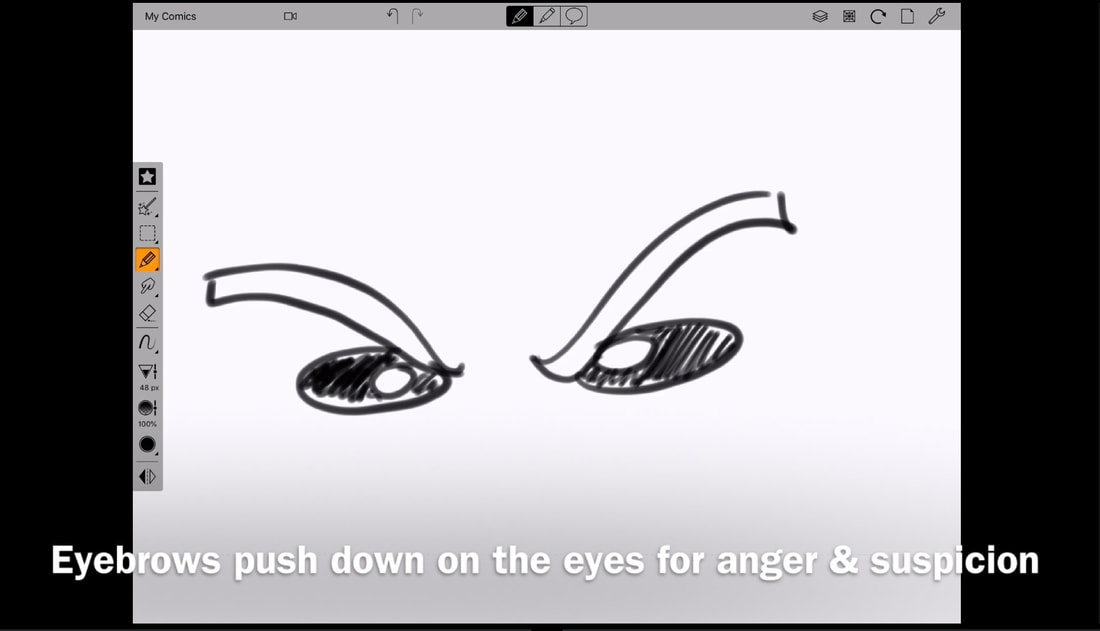
The eyebrows push down on the eyes for expressions like anger & suspicion. They squish and become shorter & wider.
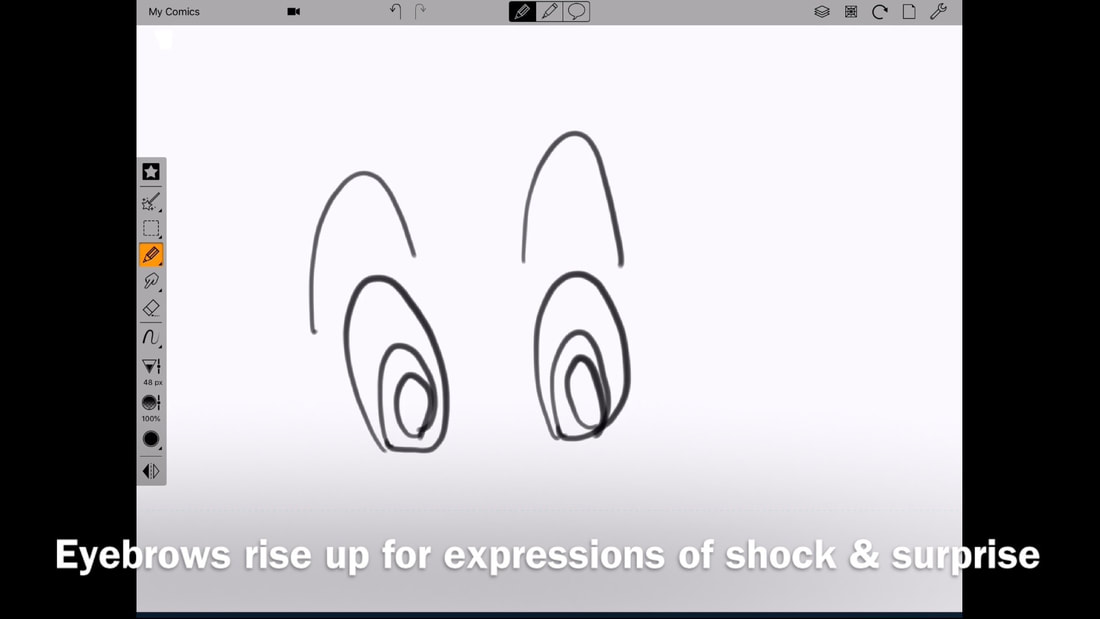
The eyebrows rise up for expressions like surprise & shock. Stretch the eyeball to make it taller & thinner.
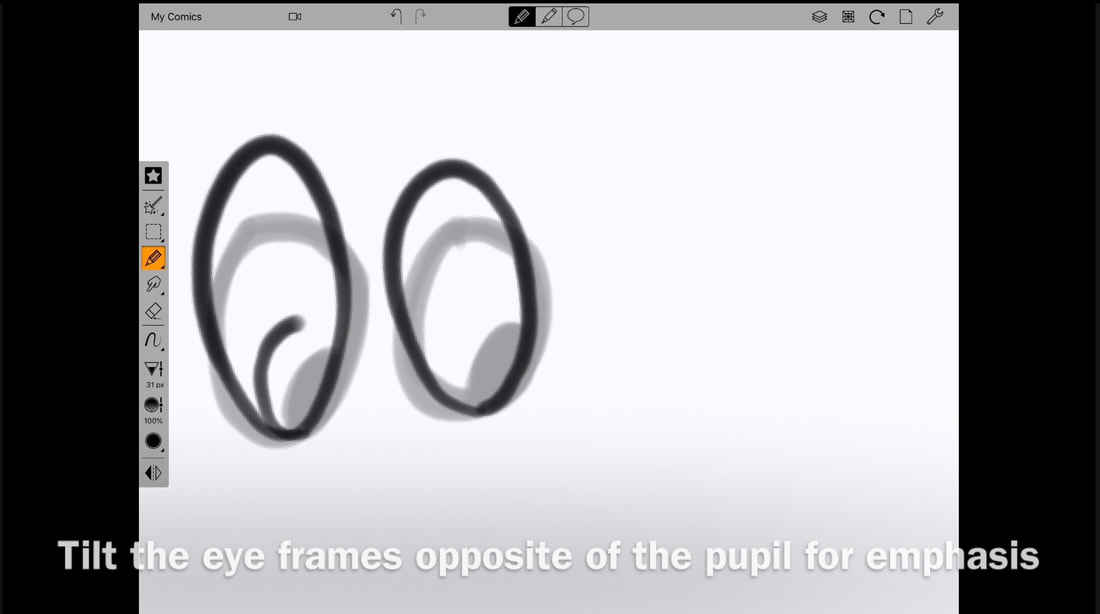
Add emphasis to a look by pressing up the pupil against the side of the eye.
Strengthen the expression of a character looking to the side by tilting the eye frame in the opposite direction.
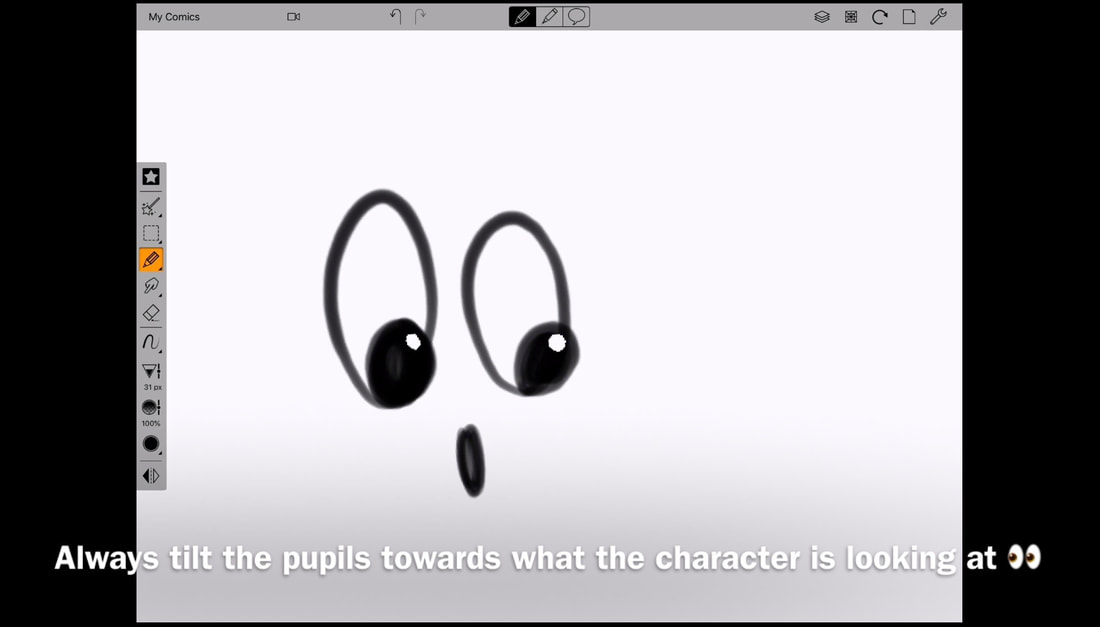
Always tilt the pupils towards what the character is looking at.
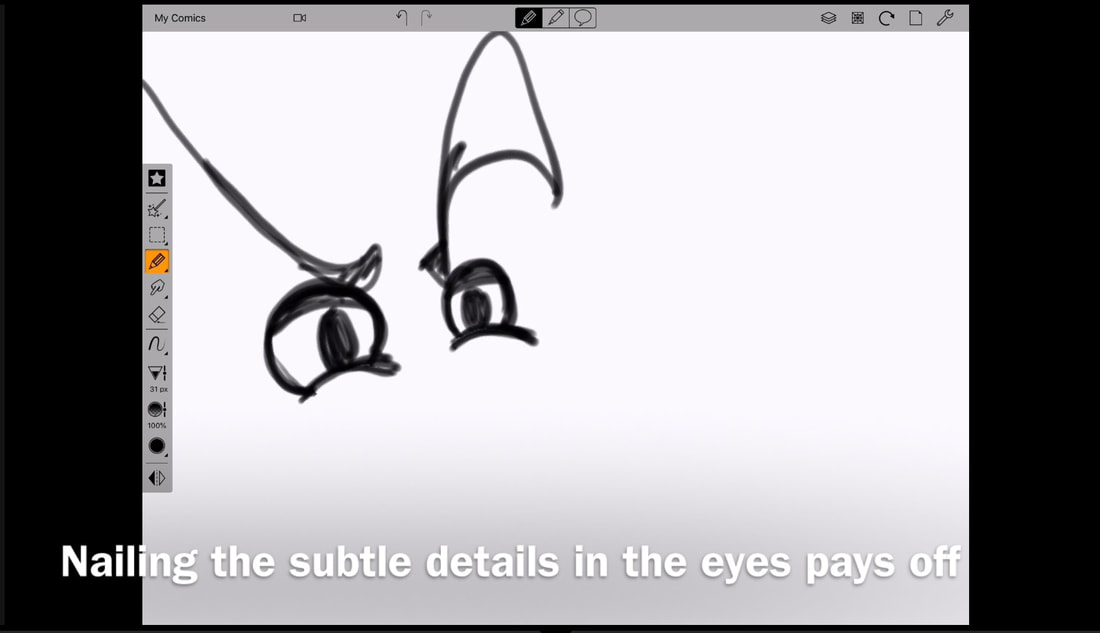
The eyes is one area where subtle details really pay off.
Making your characters’ eyes as expressive as possible will bring a lot of life into them.
Thank you for tuning into this week’s tutorial. I hope this has been helpful for you on your comic journey. Check out the additional resources below for links to the references & materials I use. Peace, Loso special thanks to our official sponsor Plasq for providing the invaluable app Comic Draw! follow on us social media! @Prime_Vice #primevice @AnanyaVahal @Plasq @ComicDrawApp #comicdraw #startyourcomictoday @ComicConnect Additional Resources
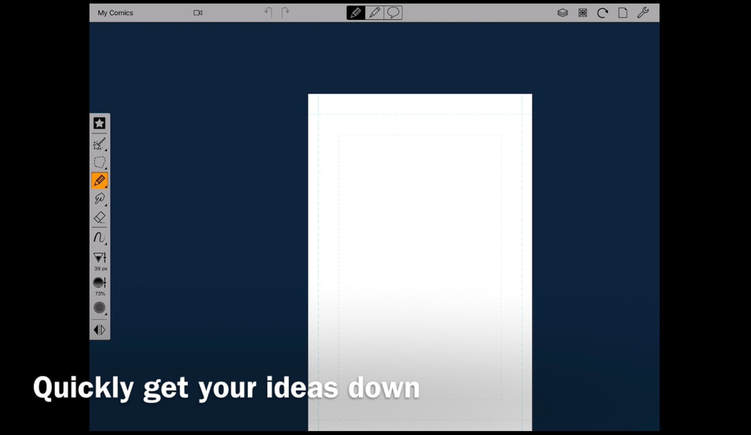
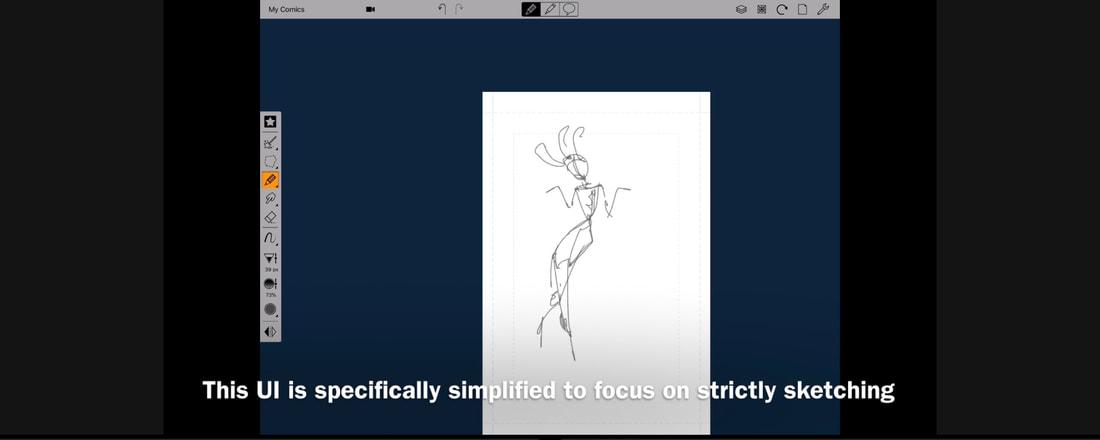
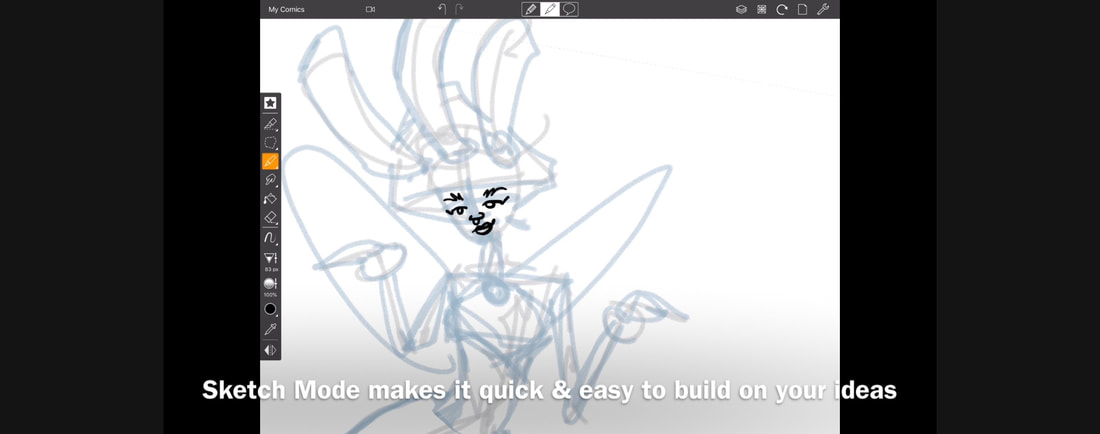
The Comic Draw app features a built in sketchpad to quickly rough out your ideas and build upon them later.

Comic Draw has 3 distinct modes: Sketching, Inking/Coloring & Lettering. Today we will be focusing strictly on sketching.
You can tell you are in sketch mode when the pencil icon is highlighted in the top of the UI.
The Sketch Mode UI was designed with specific features that make it easy to only focus on sketching.
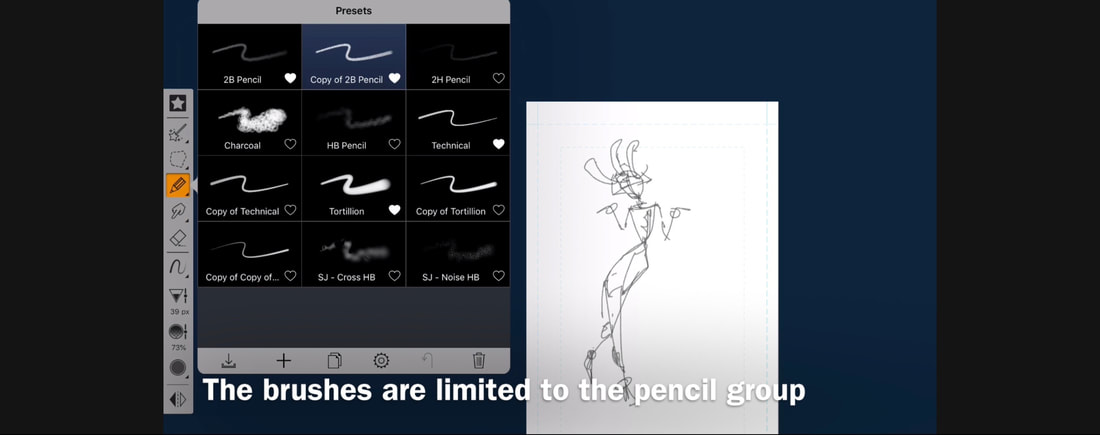
While in Sketch Mode you you will only be able to utilize the pencil group brushes opposed to the wide variety of screen tones, paints, and pen tools which available in the Inking/ Coloring Mode.
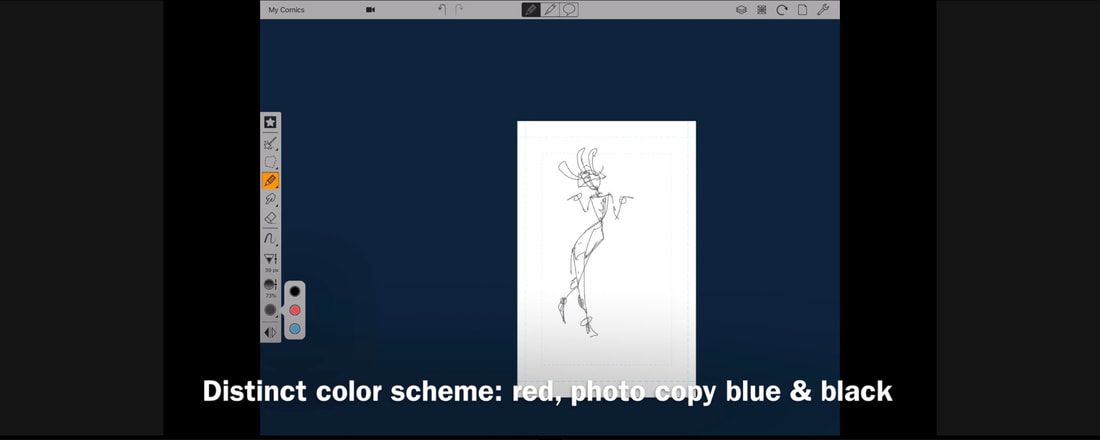
Sketch Mode mimics using a traditional pencil and paper to start your comics. It is common to use red, photo copy blue and of course black-grey pencils to start building your drawings. 
You can use multiple layers to build your drawings. Use different colors to easily differentiate between the rougher to more refined lines.
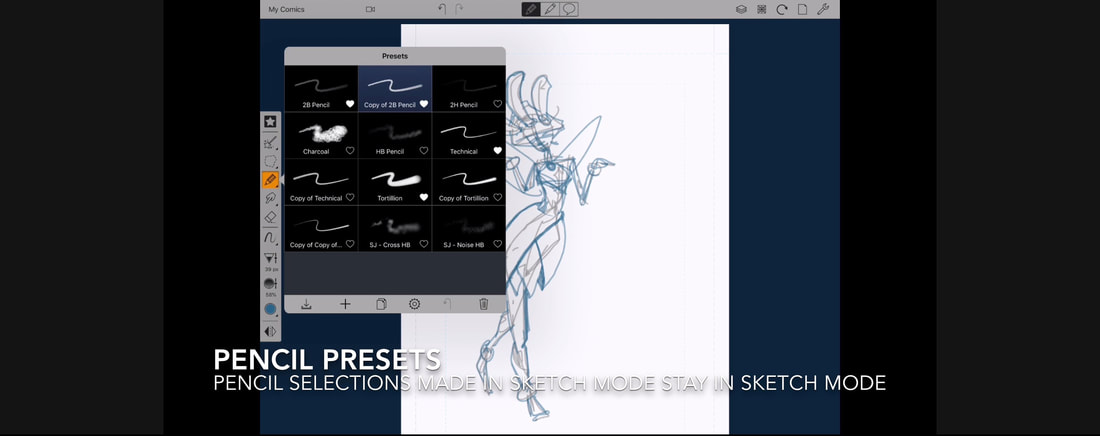
Although your limited to only the pencil category you do have a wide variety of brushes that you can customize and add to. Including but limited to hard to soft lead pencils, mechanical, and charcoal.
Your pencil presets are saved. As you switch between modes your presets are preserved in their respective UIs.
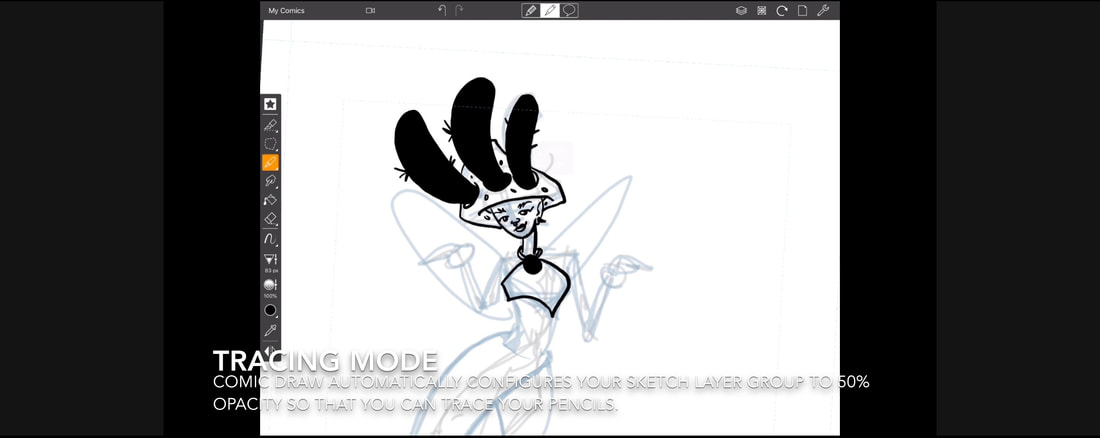
Comic Draw also mimics the traditional use of tracing paper or drawing over light box. After finishing your sketch you can switch over to Inking/Coloring Mode by clicking on the the Pen icon at the top of the screen. Your sketches will then automatically configure to 50% opacity so that you can ink and color your pages.
Sketching is the foundation for working through ideas. Comic Draw is an excellent tool for making that pivotal part of the creation process accessible and fluid.
Thank you for tuning into this week’s tutorial. I hope this has been helpful for you on your comic journeys.
Check out the additional resources below for links to the references & materials I use. Peace, Loso special thanks to our official sponsor Plasq for providing the invaluable app Comic Draw! follow on us social media! @Prime_Vice #primevice @AnanyaVahal @Plasq @ComicDrawApp #comicdraw #startyourcomictoday @ComicConnect Additional Resources
There is no one way to make a comic. As artists inspiration can hit an any given time and we must be prepared. The beauty of creating comics is the opportunity to work in a hybrid manner.
Technology has made making comics easier than ever. You can utilize the traditional tools of paper & pencil and digital power of a computer. In this tutorial I show you how to digitize your paper sketches to create comics using the Comic Draw app.
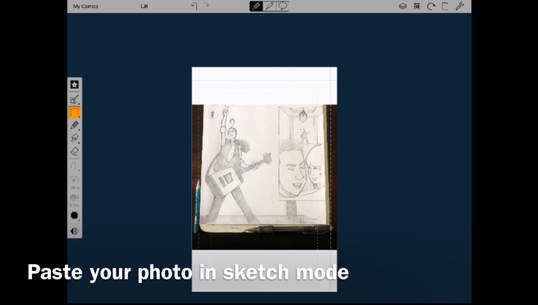
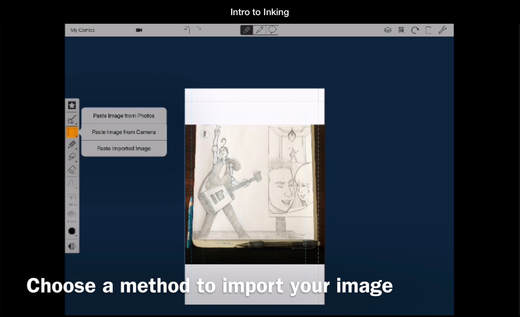
The first thing you want to do is paste your image onto the drawing interface. Import your drawing by scanning it and downloading it from your cloud file, importing a picture from your photo library or just taking a picture with the camera. Make sure your in the Sketch Mode user interface of the app (You’ll see the pencil icon highlighted above the screen).
For this sketch I just took a a straight picture because the drawing was still in a rough stage. For more refined drawings I recommend doing a proper scan and importing the file to work over.
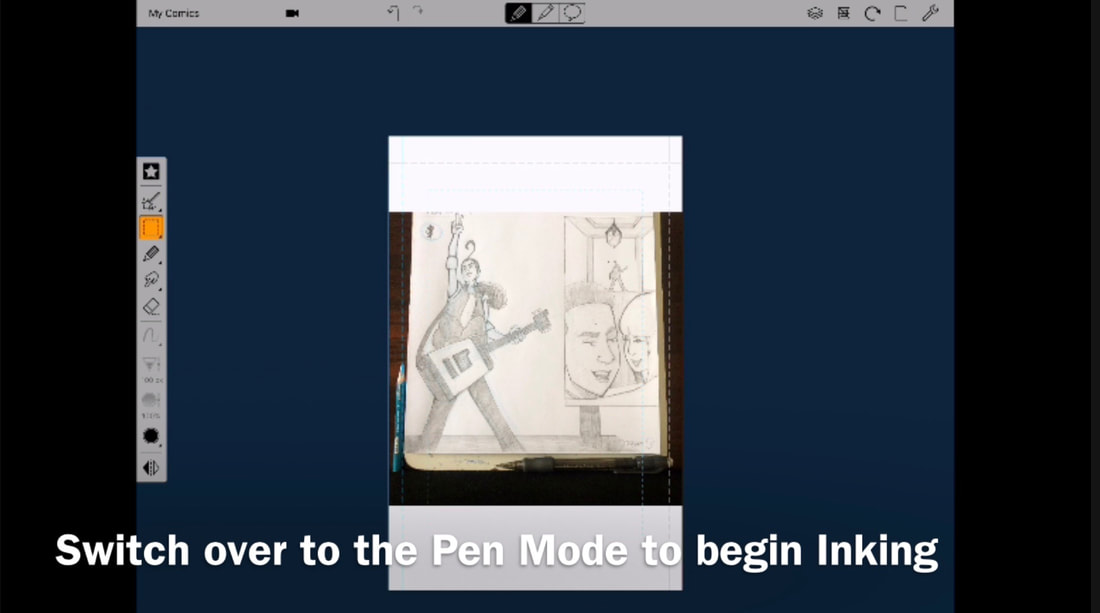
After you have brought in your drawing switch over to the Inking/ Coloring Mode by selecting the pen icon above the screen. Now you can begin drawing over your sketch. It’ll be at 50% opacity so that you can easily trace over your work.
You can also go back to Sketch Mode if you need to make any additional adjustments without affecting your inking & coloring layers.
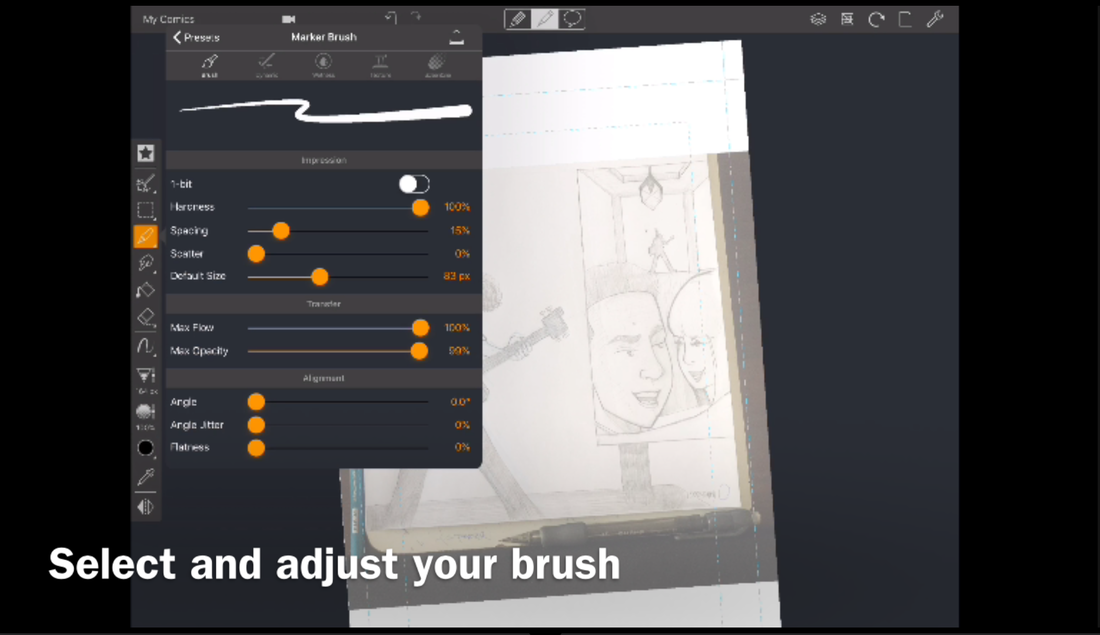
When you select your brushes make sure they are calibrated to the appropriate adjustments needed for your work.
Switching your brush to 1-bit mode to make each mark either opaque or empty. This makes it easier for laying flats for coloring.
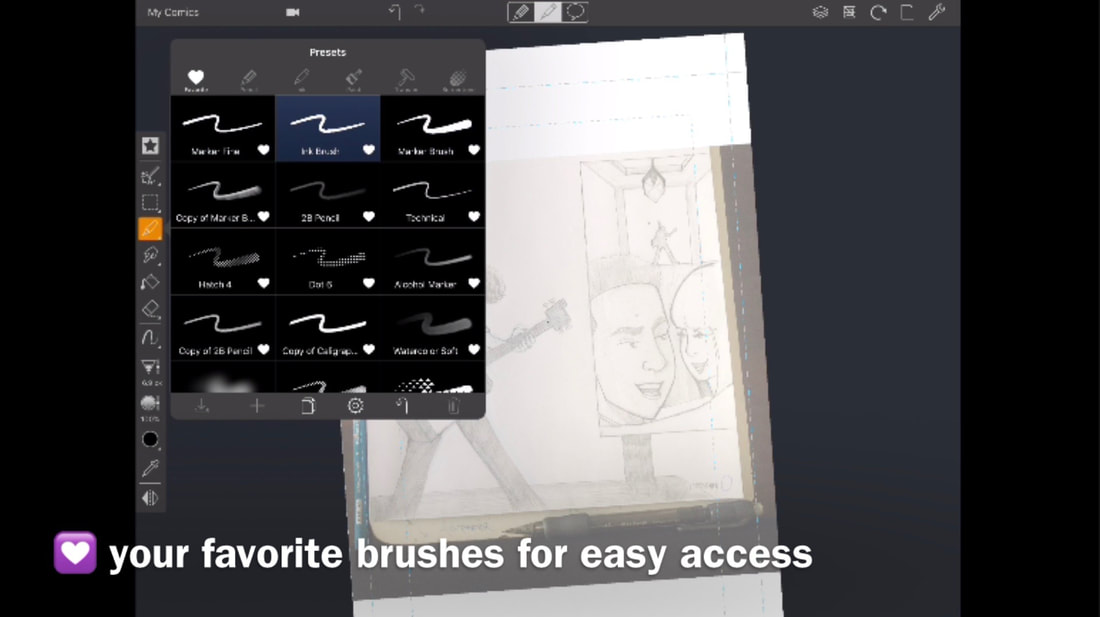
Brushes are collected organized by categories for easy access (Pencils, Pens, Paints, Screentones). You can ❤️ your favorite brushes and have them all in one tab for your convenience.
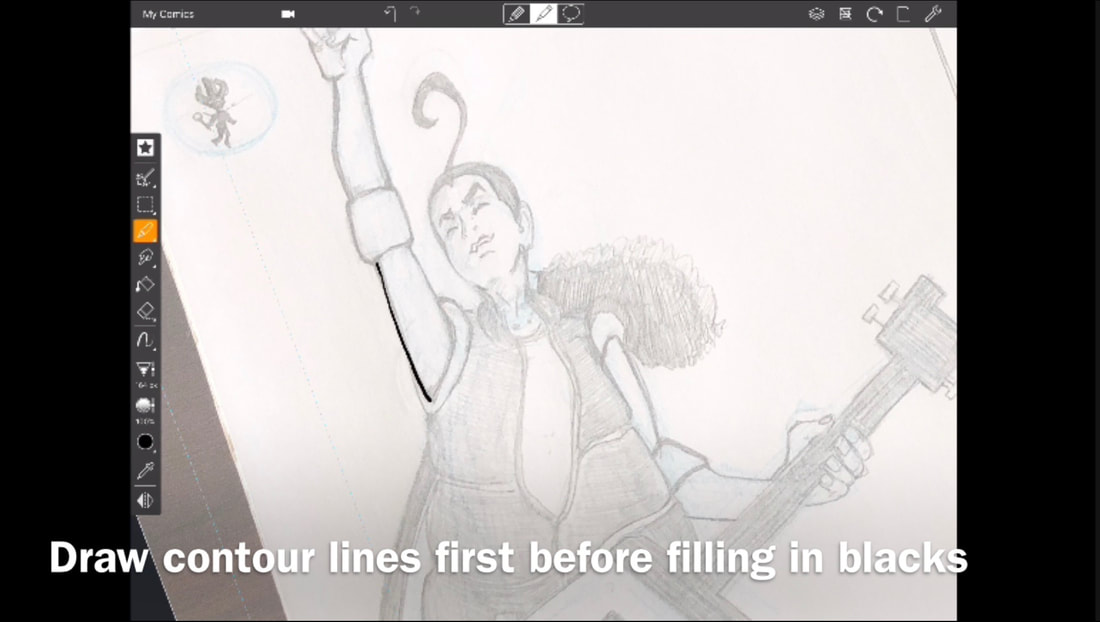
When drawing over your sketches. Start by marking the contour lines first. It’ll save you time later when you have to fill in large areas. This is very useful for spotting blacks and filling in colors with the bucket tool.
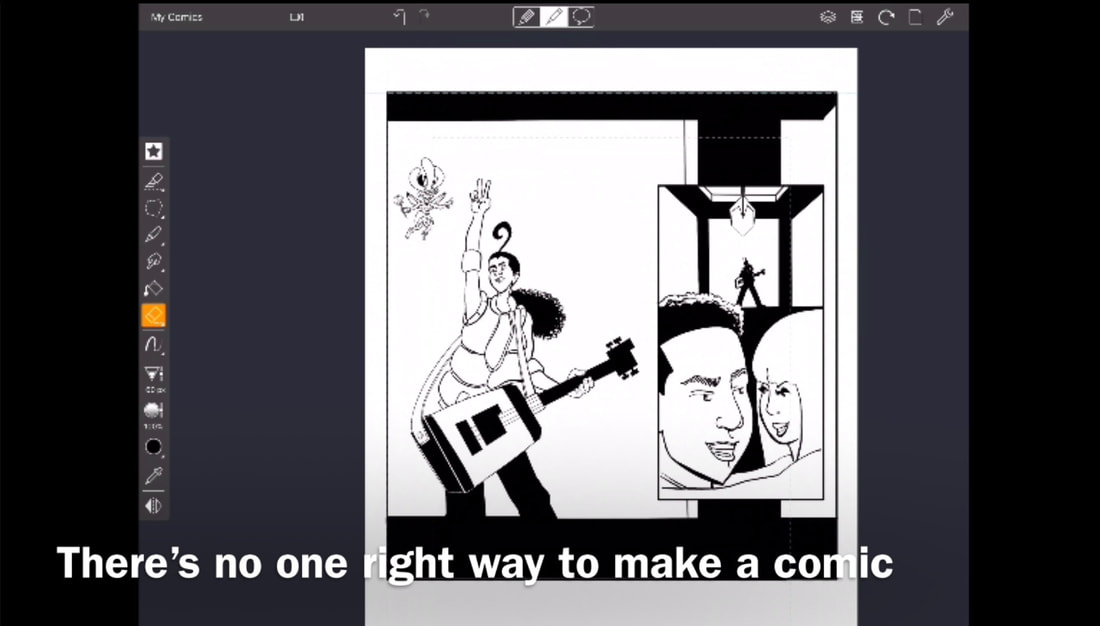
I prefer to finish all of my line work in black first before moving onto color. This makes it easier to process my work for coloring later or passing along a project to a Colorist & Letterer. This is not to say that you should not experiment with your own processes.
Comic Draw makes it fun to explore different ways of making comics. Remember there is no one right way to make a comic. All that matters that the art is clear to read and understand for the the reader.
Thank you for tuning into this week’s tutorial. I hope this has been helpful for you on your comic journeys.
Check out the additional resources below for links to the references & materials I use. Peace, Loso special thanks to our official sponsor Plasq for providing the invaluable app Comic Draw! follow on us social media! @Prime_Vice #primevice @AnanyaVahal @Plasq @ComicDrawApp #comicdraw #startyourcomictoday @ComicConnect Additional Resources
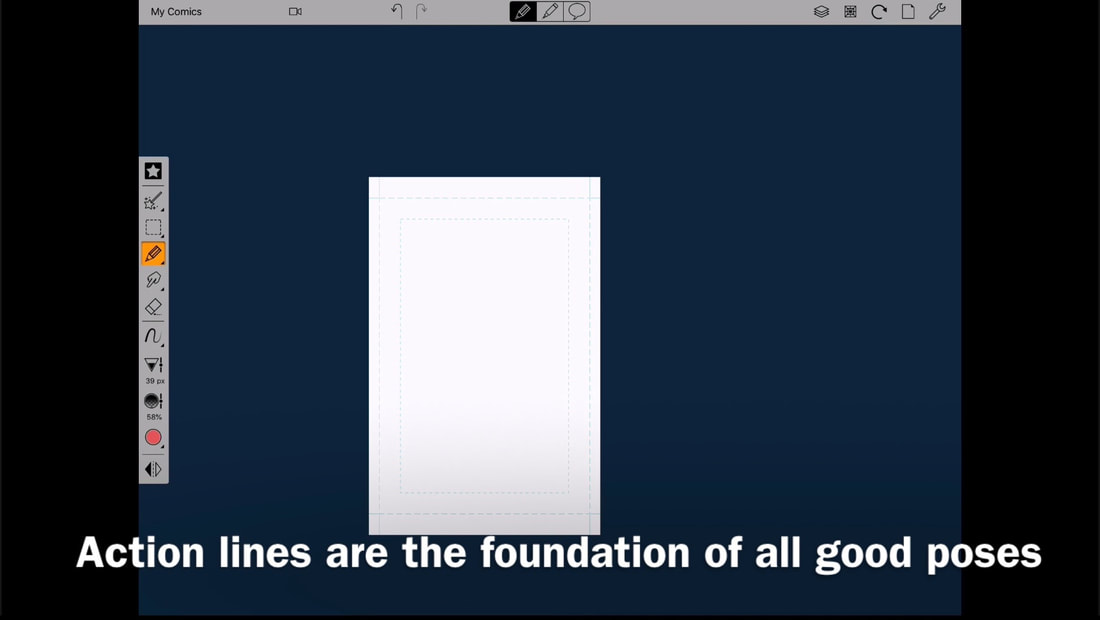
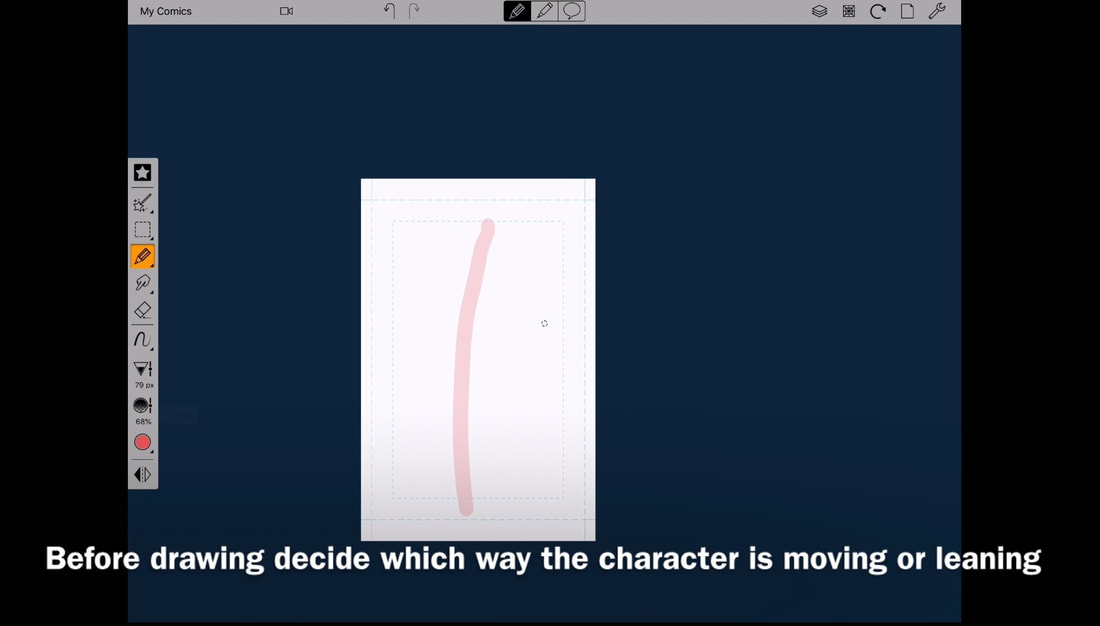
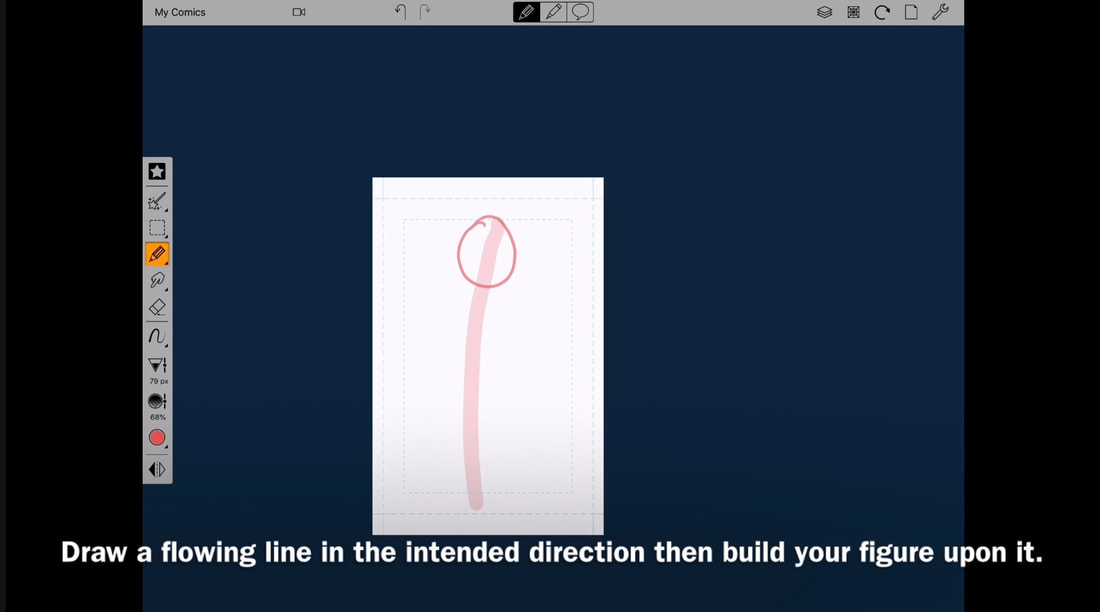
The line of action is a tool to help cartoonists quickly determine the direction of their characters. It is the first mark you make to draw figures in life like action.
Starting with the line of action makes sure your drawing remains unified and flows
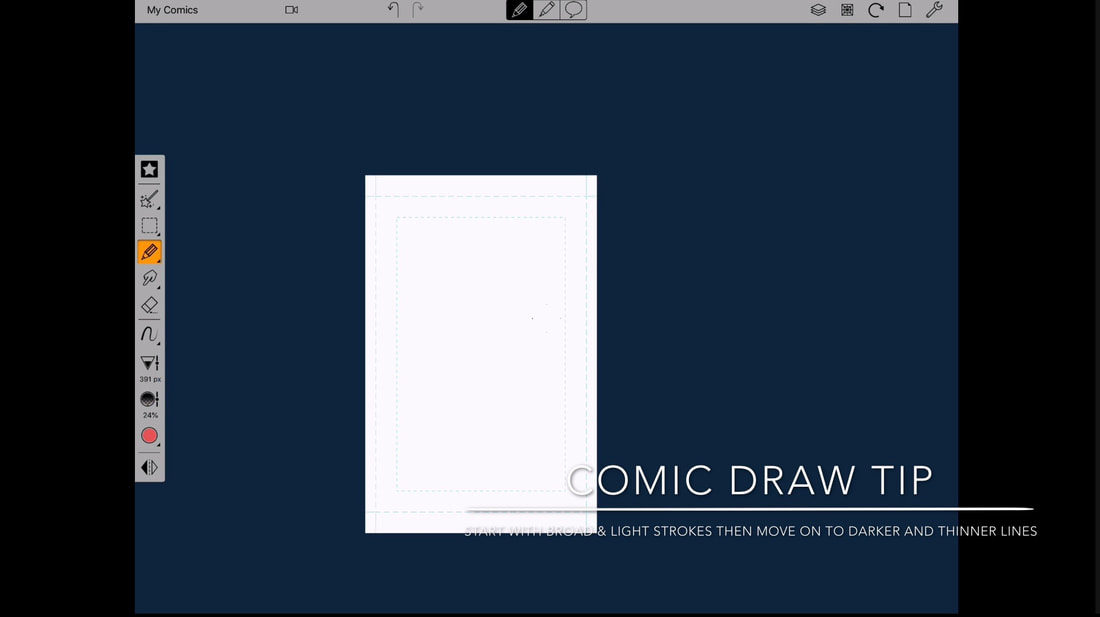
Start with a light & broad stroke then use darker & thinner lines to build up your drawing. It is usually better to build your drawings from general to specific. It allows to build from from a strong foundation.
Get a feel for the pose your about to draw. Think about what they are doing or how they are standing.
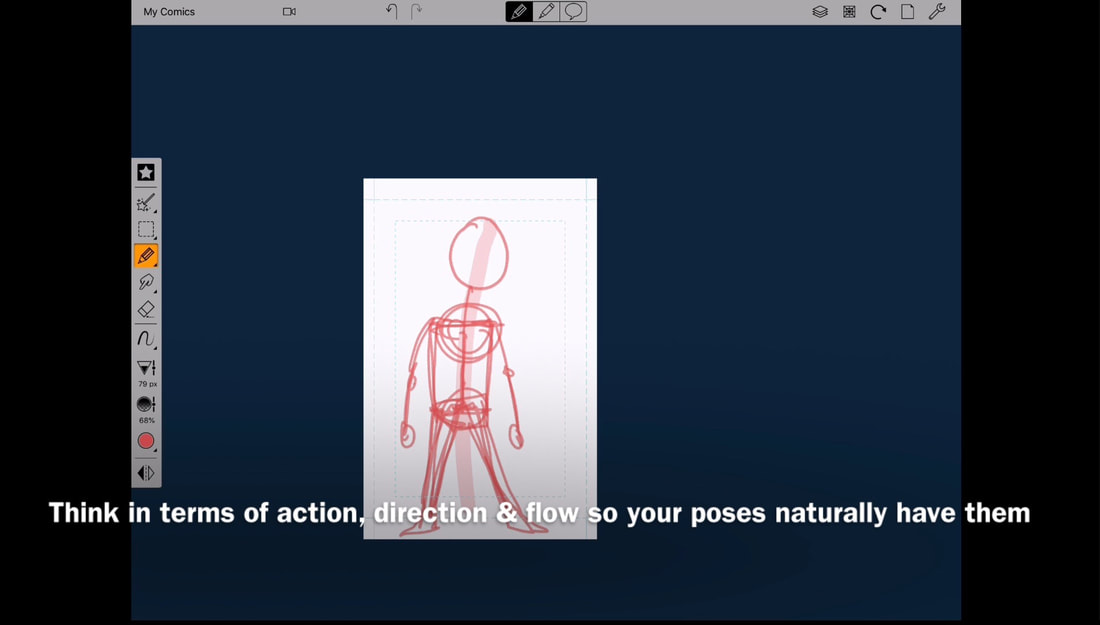
Think of the line of action as an arrow going from one point to another. It’s directional flow will dictate which way the character is facing and how they are taking up space. Build your figure upon the flow line to keep you figure in movement unified.
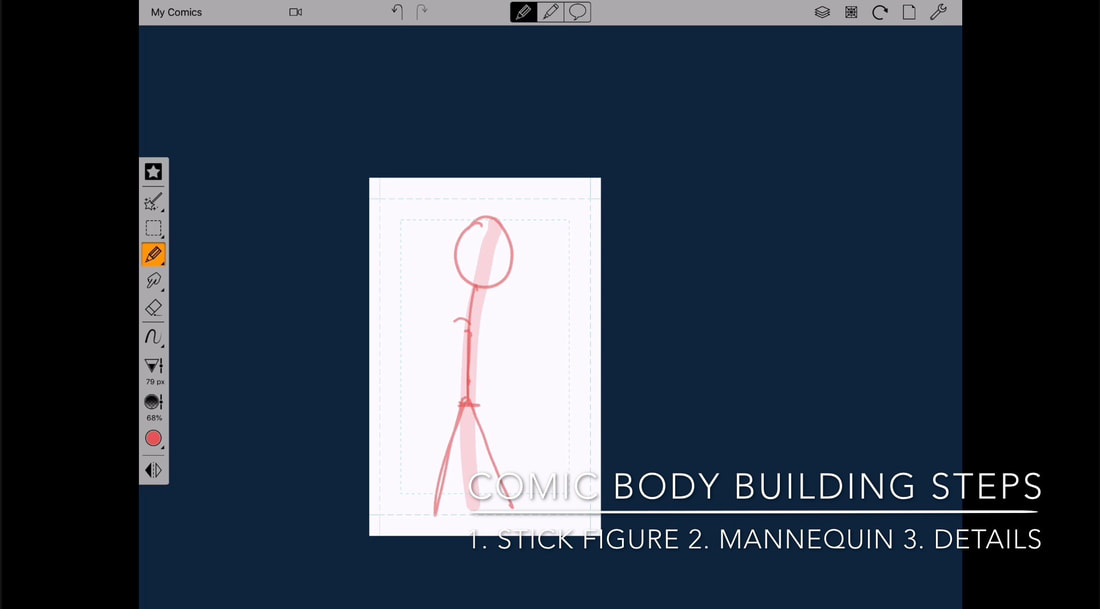
A quick review to build your figures. Please feel free to review these steps from previous posts by clicking their links.
1. Start with the stick figure 2. Make a mannequin 3. Add details
Eventually you will be automatically thinking in terms of action, direction & flow so your poses will naturally have them. You may even just start with how the the spine is moving and build from there.
The line of action is a traditional cartooning tool for capturing life in your comic characters. Aim for seeing your character’s as moving life-life creatures caught in the moment instead of statues locked into a fixed position.
Thank you for tuning into this week’s tutorial. I hope this has been helpful for you on your comic journeys. Check out the additional resources below for links to the reference material I use. Peace, Loso special thanks to our official sponsor Plasq for providing the invaluable app Comic Draw! follow on us social media! @Prime_Vice #primevice @AnanyaVahal @Plasq @ComicDrawApp #comicdraw #startyourcomictoday @ComicConnect Additional Resources |
Archives
November 2023
Categories
All
|












 RSS Feed
